How to Create an IKEA Media Center Build
See how we created an IKEA media center build. A budget-friendly way to design a functional TV unit with storage for games, DVDs, and more.

Table of Contents
Why We Chose IKEA
I’ve always loved using IKEA for projects like this. Their cabinets are affordable, simple to work with, and come in so many different sizes that it makes planning a built-in much easier. Custom built ins can be really expensive, but using IKEA lets you create the same look for a fraction of the cost. One of my favorite things is that I can go pick everything up myself and build it on my own.
I love having projects like this that I can tackle myself and turn into something that looks custom in our home. I actually did something similar in our living room when I built a long TV stand using IKEA BESTA units. If you want to see that project, you can read the full tutorial here.
Planning Our IKEA Media Center
Planning the layout was one of the most important parts of creating our IKEA media center. One thing that’s really helpful is that IKEA actually has online planning tools where you can enter the dimensions of your room and design your setup exactly how you want it. You can move cabinets around, try different sizes, and see what the finished layout will look like before buying anything. I used their planning tool to map out our media center so I could make sure everything would fit perfectly in our space and look the way I envisioned it in our home.
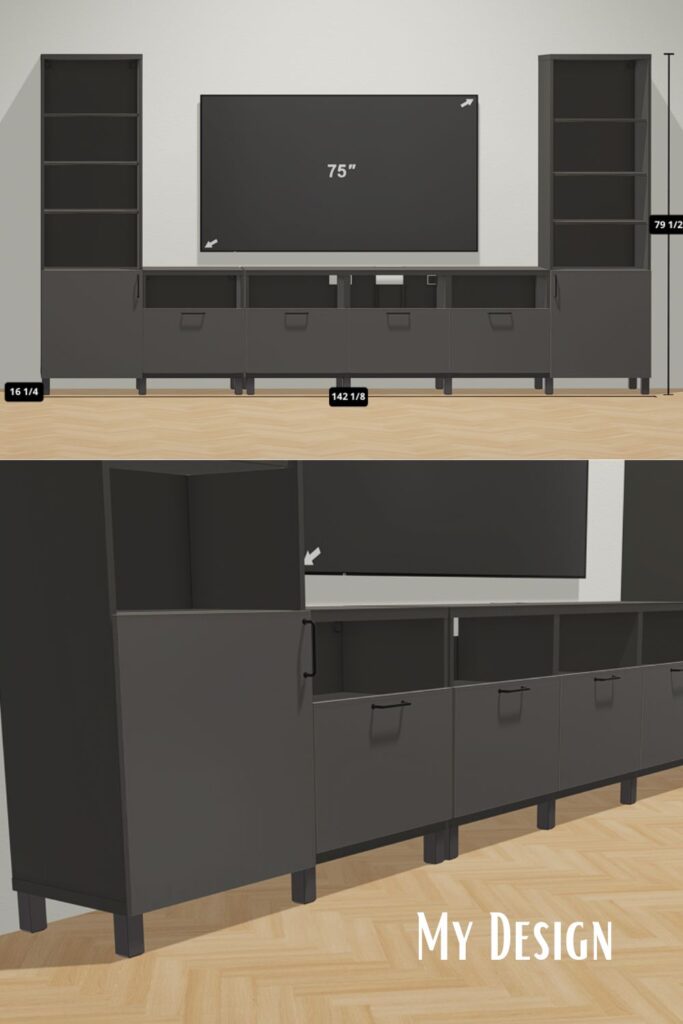
Another thing I love about using IKEA’s planning tool is how easy it makes getting everything you need. Once you finish your design, you can save it and it automatically creates a list of all the items required for the project. From there, you can either scan the barcode at the store and pull up your full list, or simply add everything to your cart online and schedule a pickup. It makes the whole process so simple and takes the guesswork out of making sure you have all the pieces for your build.
The IKEA Cabinets We Used
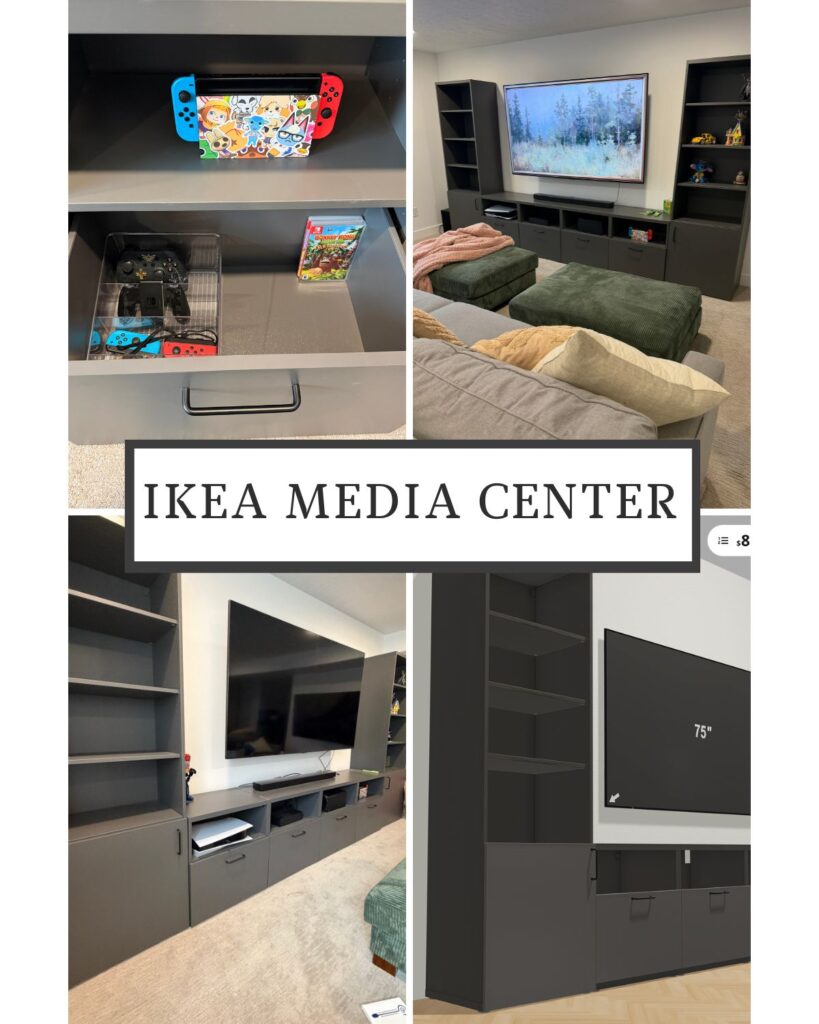
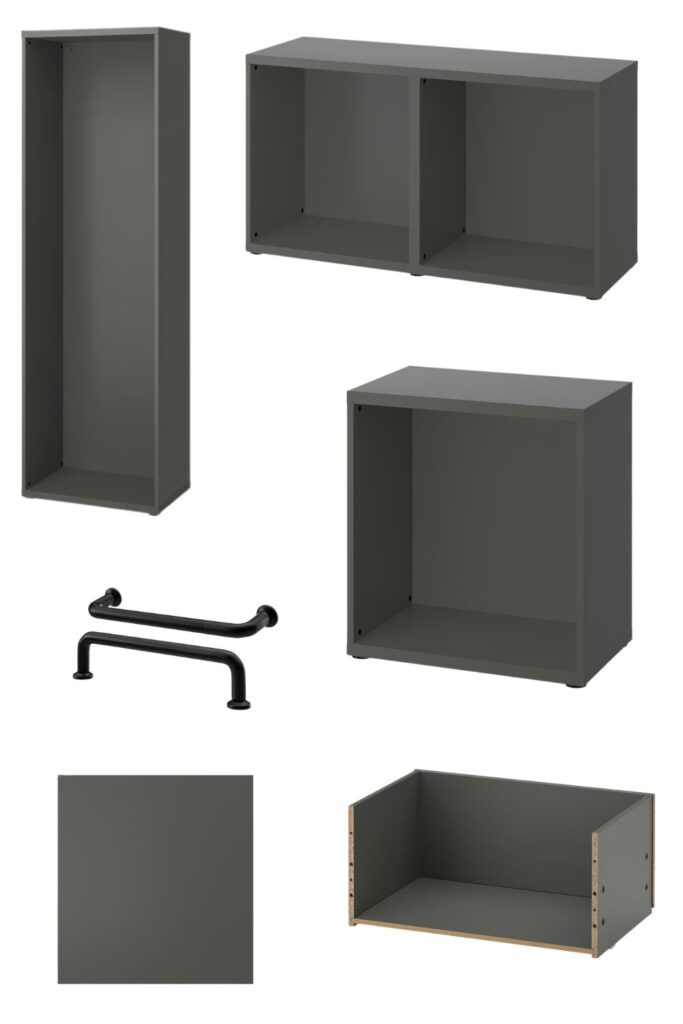
For our Ikea media center, I used the BESTA units from IKEA in the dark gray color. I love the BESTA line because there are so many design options to choose from. They come in several different colors, and you can mix and match drawers, cabinets, and open shelving depending on the look and storage you want.
You can also choose from a variety of cabinet fronts and handles, which makes it easy to customize the style to fit your space. The design possibilities are really endless, which makes projects like this fun to plan. For our media room, I wanted a combination of drawers, cabinets, and open shelving so we could have both hidden storage and display space, which is why the BESTA units worked perfectly for this built-in.
Building the Cabinets
Installing the cabinets was actually much easier than I expected. One thing I love about IKEA furniture is that it’s lightweight and fairly simple to put together. It can be a little time consuming, but it’s definitely doable as a DIY project. I was able to assemble everything myself, and my boys even helped me. I told them it was basically like putting Legos together, which they thought was pretty fun.
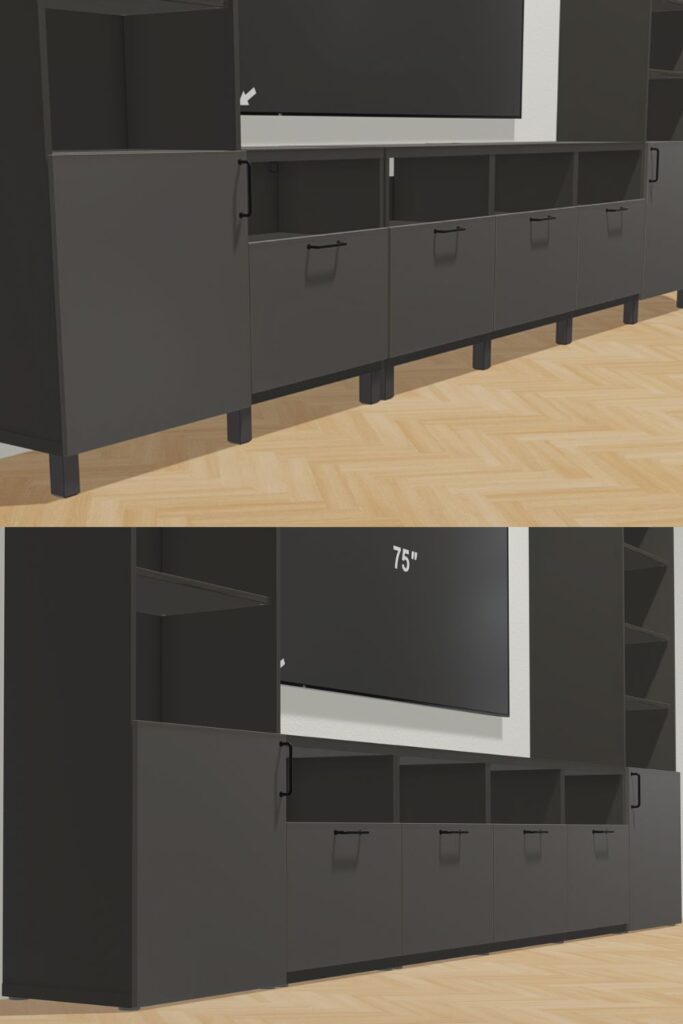
For this project, I decided to keep things simple and center the media unit on the wall in our basement instead of going wall-to wall like a full custom built in. If you wanted that custom look, you could easily add trim and make it feel completely built-in. I just didn’t feel like painting all the cabinets because I actually loved the color they already came in.
One thing I ended up changing during the build was the legs. Originally I had planned to use different legs, but I ended up just using the ones that come with the unit. Since the media center is sitting on carpet, you can’t really see the legs anyway. I simply adjusted them high enough so the cabinets were level and everything lined up nicely. It made the installation much easier and still gave the unit a clean, finished look.
Storage That Makes the Media Center Functional
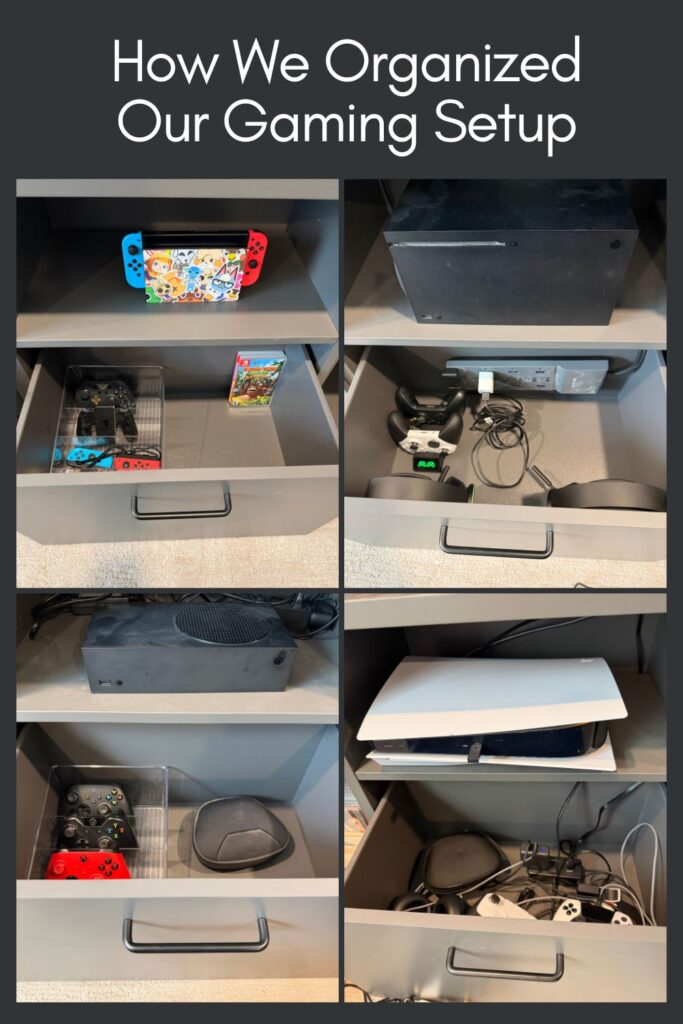
When designing the Ikea media center, I really tried to think about what would work best for how our family actually uses the space. We love video games, so I wanted to make sure each console had its own spot. I liked keeping the shelves open so the consoles have plenty of room to breathe and don’t overheat while we’re playing. Under each console, I added drawers where we can store the controllers and accessories for that specific system, which makes everything easy to find and keeps the space organized.
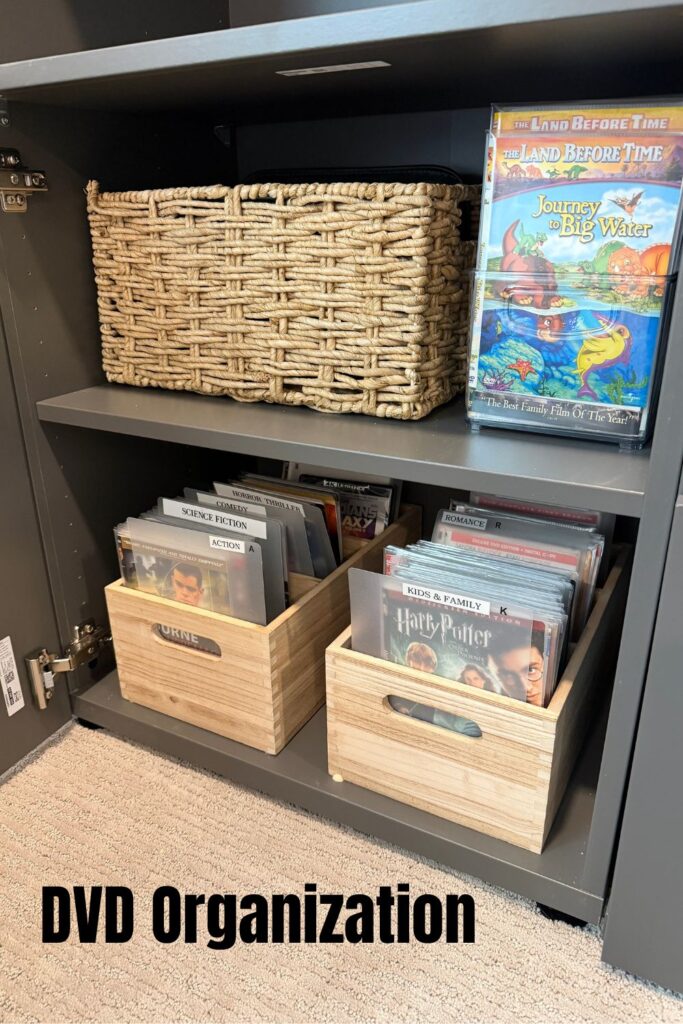
I also added cabinets on the sides to store all of our DVDs so they’re tucked away but still easy to access. If you want to see how I organize all of our DVDs, you can read my DVD organization post here. We’re also big LEGO fans, so we’re planning to fill the shelves with some of our favorite builds. It ended up being a really functional setup with lots of great storage for our family.