How to create this fun Toy Story birthday box photoshoot
This Toy Story birthday photoshoot in a box was one of my favorite photoshoots that I have done with my boys. It’s also one of my most pinned post on Pinterest. I thought it was time to show everyone how I created this photoshoot so you can recreate it with your own kids.
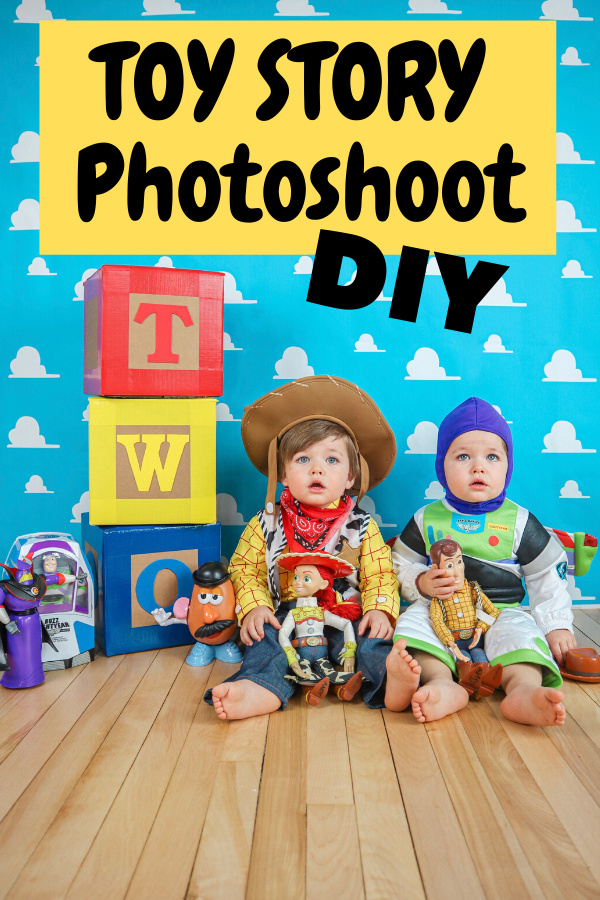
When the boys turned two I loved the theme “two infinity and beyond” so I did this Toy Story birthday photoshoot in a box and also did another one as well. I loved how they turned out, hope you have fun doing it as well.
Table of Contents
How to put together this Toy Story birthday photoshoot in a box
I got this idea from one of my favorite instagram accounts @bennetttriplets who does this box photoshoot with her kids all the time. She has a box made of wood when she does her square pictures, but I thought using a cardboard box would fit the Toy Story theme better. I’m always getting asked how I was able to do this Toy Story Birthday box photoshoot, so I wanted to do an official blog post about it.
Learn to take photos at home
I go more into detail on how to take your own photos at home and get them to look professional. I have video footage of me showing you how I made my wooden backdrop. I’ll share with you all the photography equipment I use. I’ll teach you how to edit your photos to add presets and remove unwanted objects from a photo. Tips and tricks on how to get kids to look at the camera and what settings to put your camera on. Everything you need to get that professional photo, but at home! Check out my course HERE.
Props
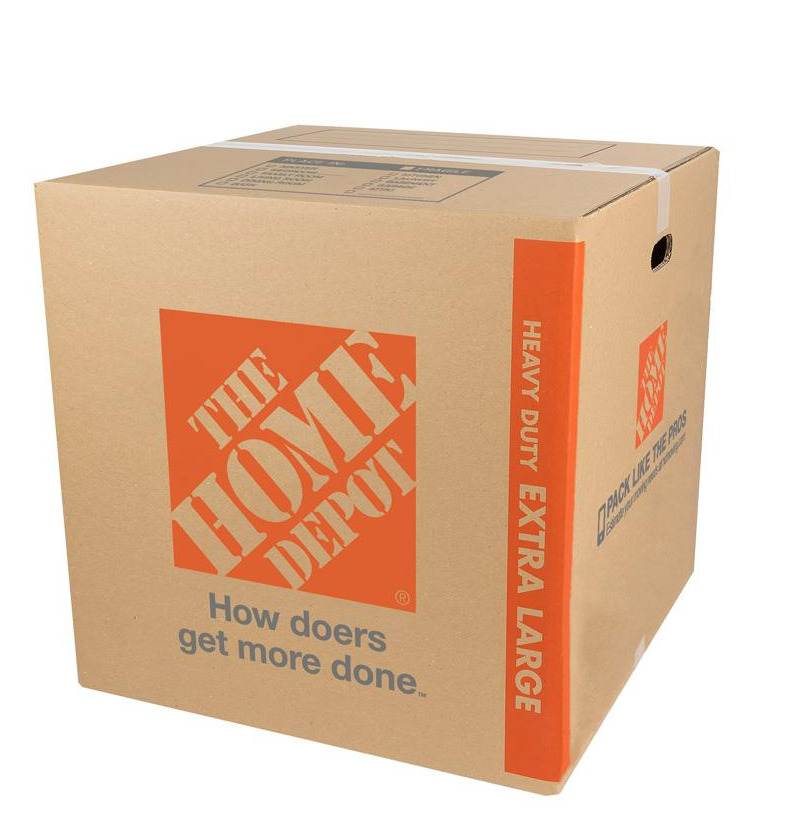
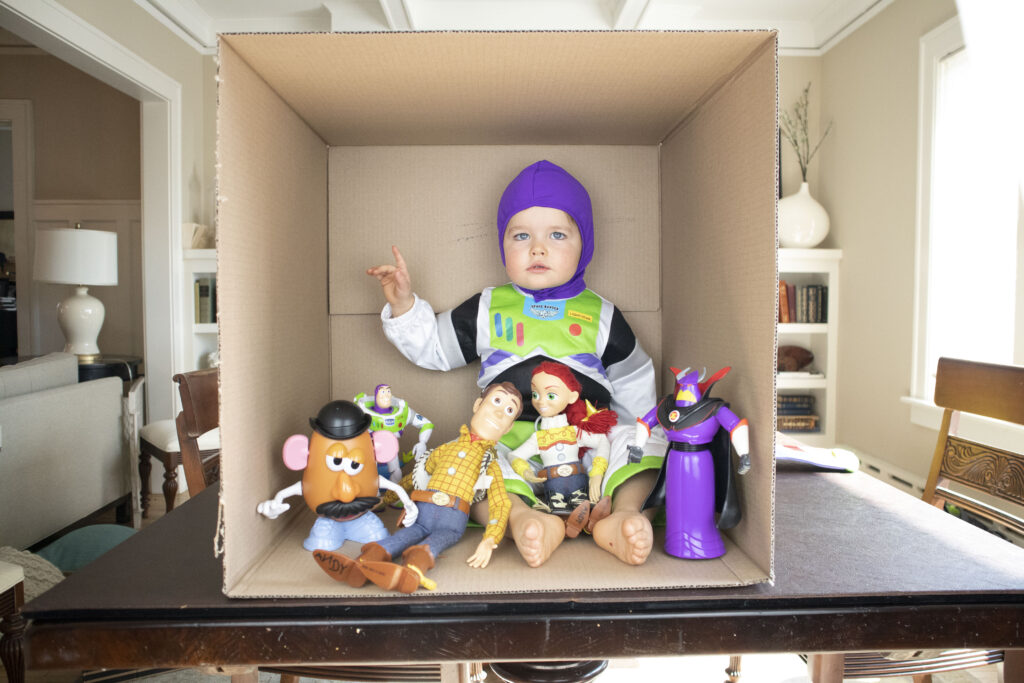
Box
The box is just an extra large box from home depot. You just want to make sure the box is a perfect square. After I got the box I used a knife to cute all the flaps off of one side and then folded up and taped the opposite side.
Heavy-Duty Extra-Large Moving Box with Handles (22 in. L x 22 in. W x 22 in. D)
Toys
Most of the toys I used in this photo I already had because my boys love Toy Story. I put together a list of some toys with links to them below.
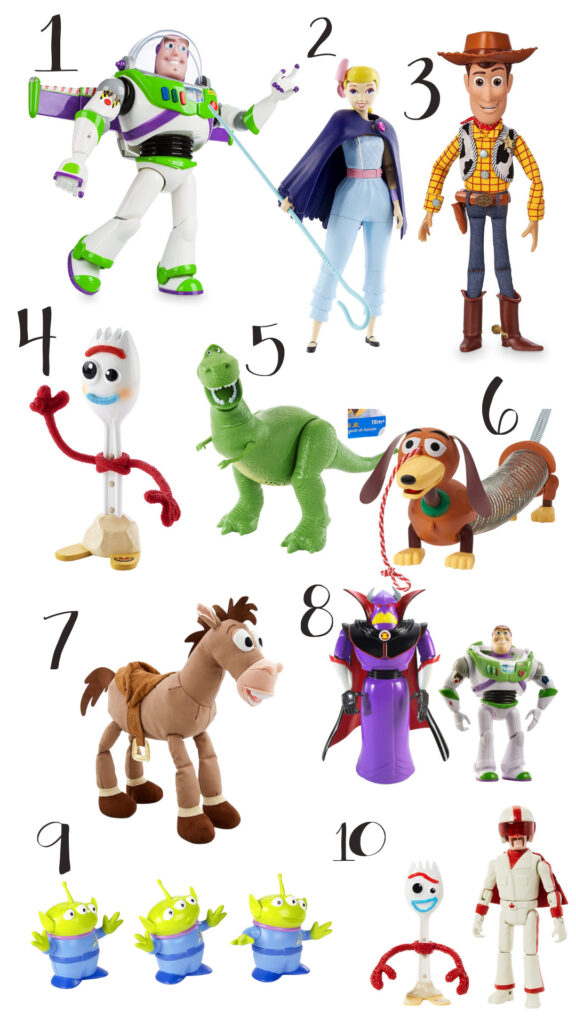
- Buzz doll // 2. Bo Peep Doll // 3. Woody Doll // 4. Forky Doll // 5. Dinosaur Doll // 6. Slinky // 7. Bullseye // 8. Zurg and Buzz Action Figures // 9. Aliens // 10. Forky and Duke Caboom Action Figure
Costumes
Believe it or not I found these costumes on Poshmark. Someone who also had twins was selling them both for $50. I was super stoked about the price so check their before you pay full price elsewhere.
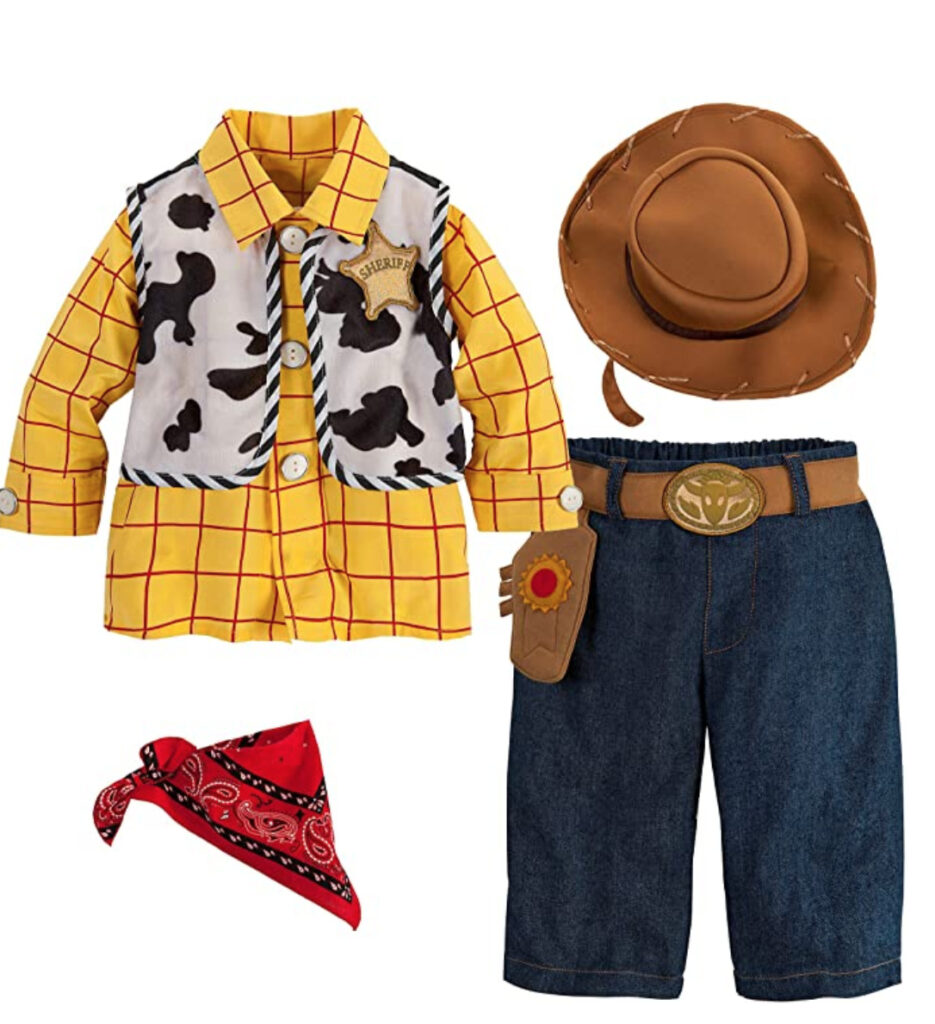
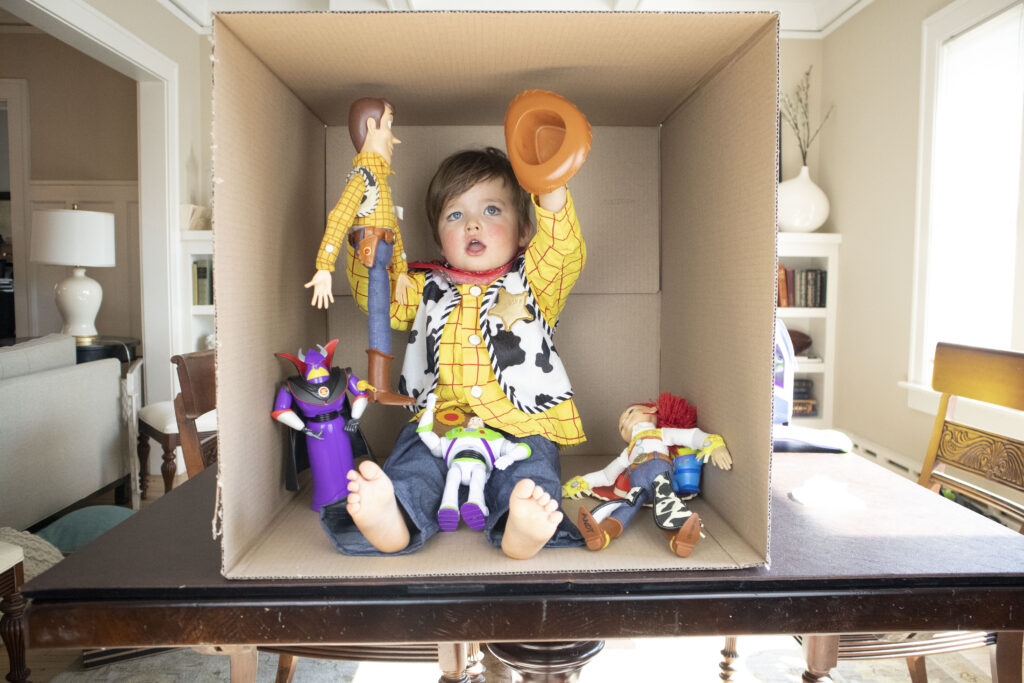
Woody Costume (Shop Disney) (Amazon) (Target)
This woody costume has sizes up to 24 months. The size of this Woody costume that Everett is wearing is size 18-24 months. It worked perfectly for them to wear for the photoshoot. Just a reminder that I bought these costumes from Poshmark so I did not buy them from Amazon. I did find the same costume on Amazon if you are interested in buying it.
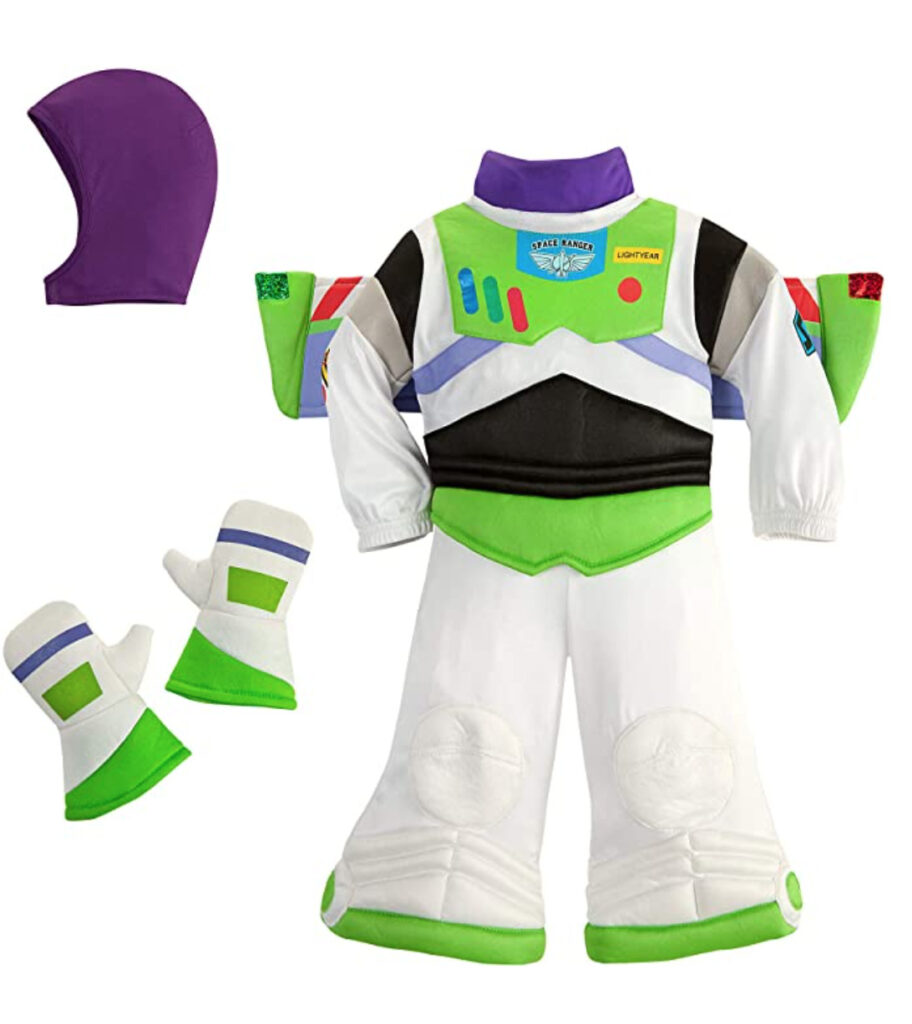
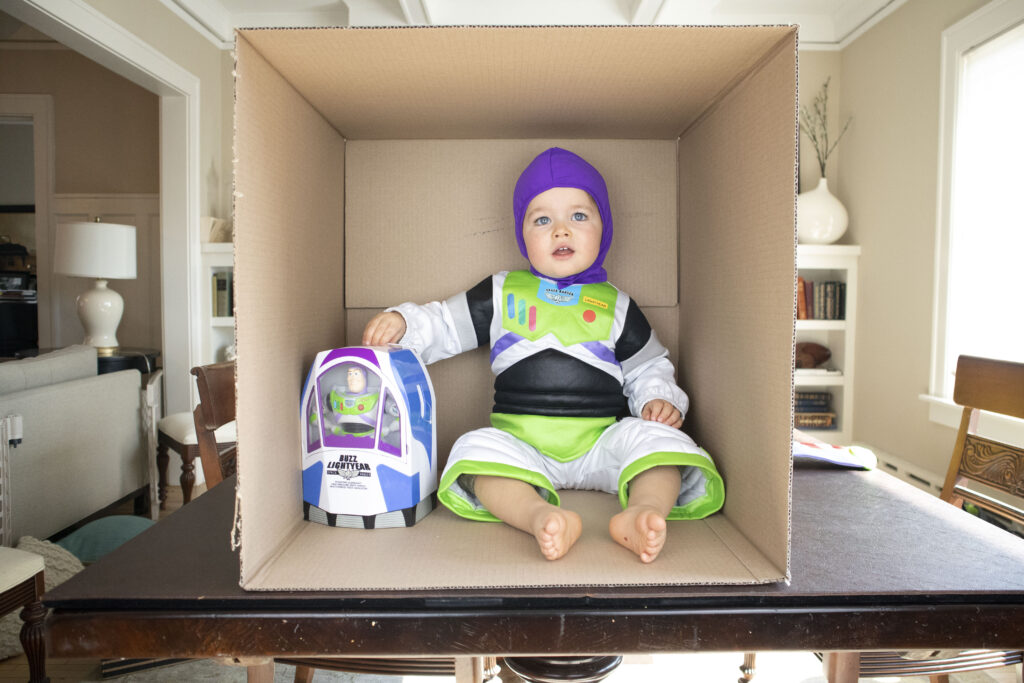
Buzz Costume (Shop Disney) (Amazon) (Target)
This Buzz costume has sizes up to 24 months. The size of this Buzz costume that Marshal is wearing is size 18-24 months. It worked perfectly for them to wear for the photoshoot. Just a reminder that I bought these costumes from Poshmark so I did not buy them from Amazon. I did find the same costume on Amazon if you are interested in buying it.
How to take the photo
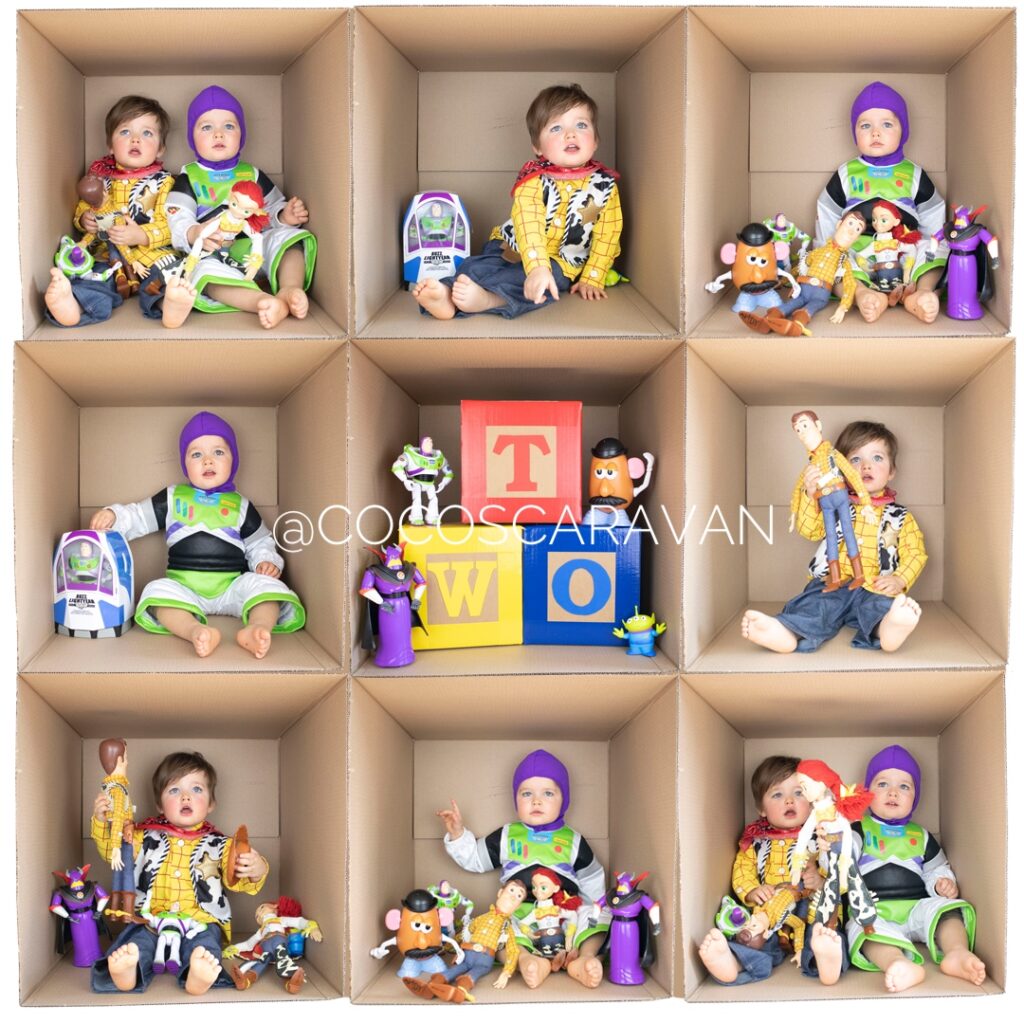
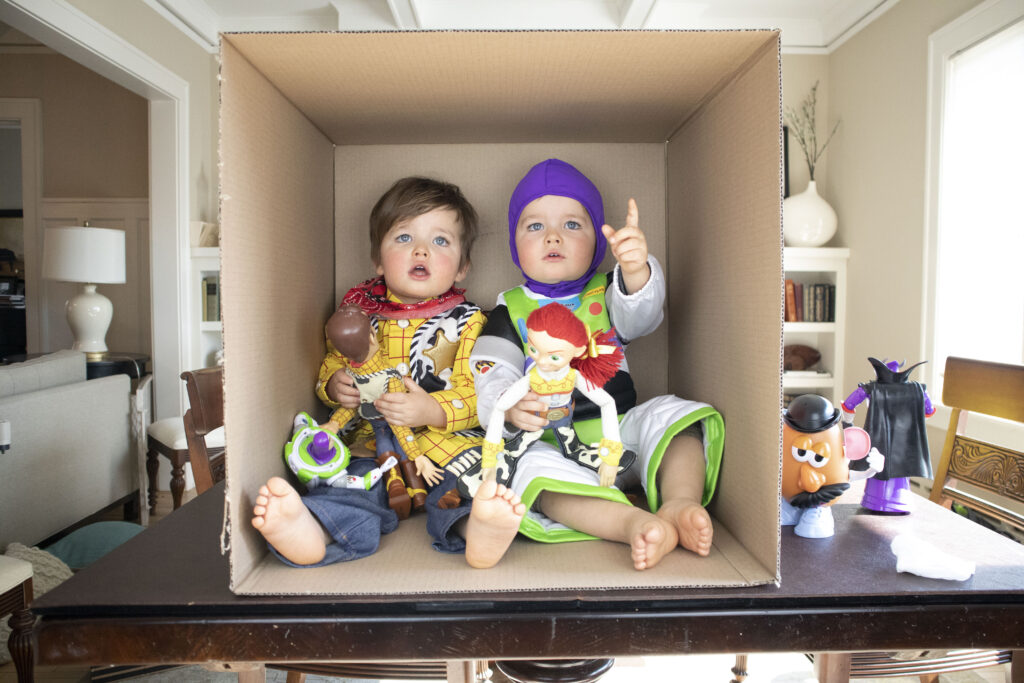
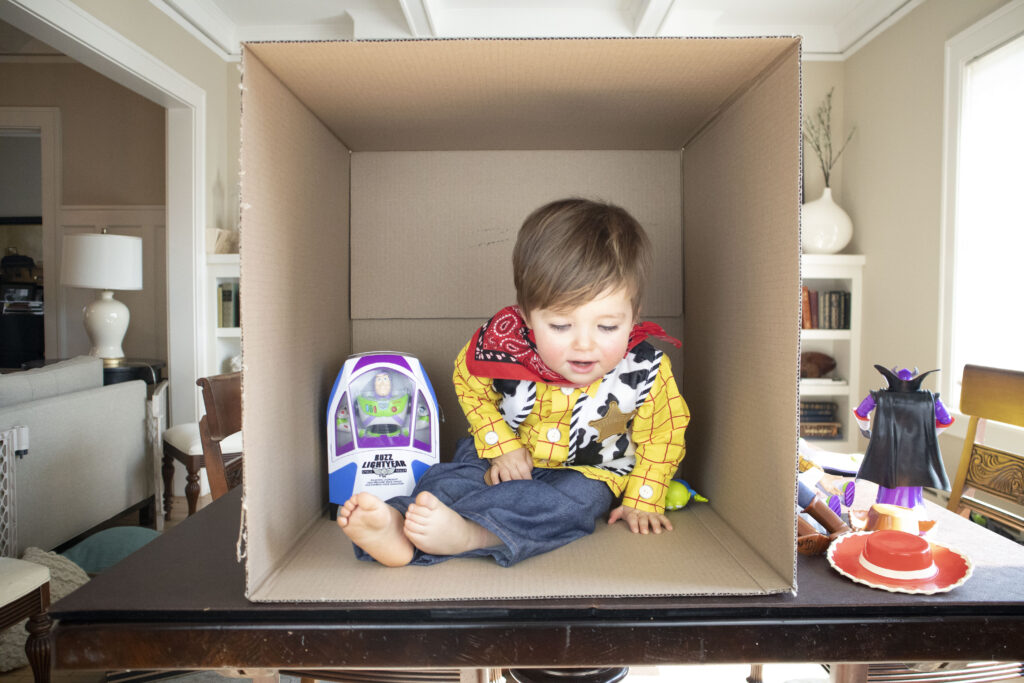
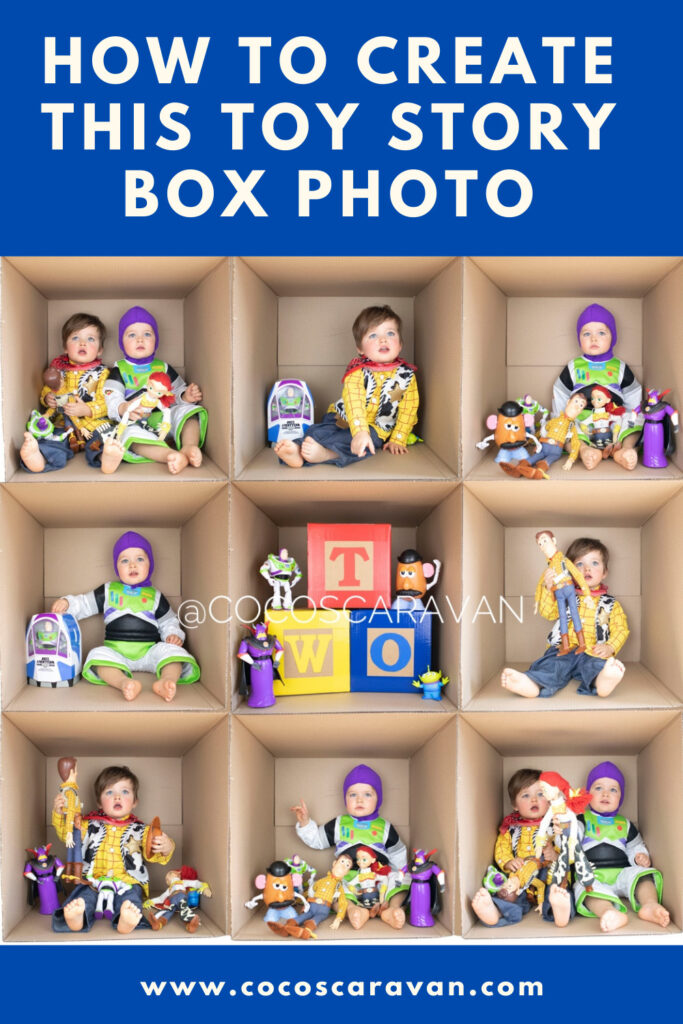
Taking the Toy Story birthday photoshoot was so fun and the boys actually didn’t mind it. They thought it was so fun to sit in the box and because they got to hold their toys they did really well. I put the box up on the kitchen table and used a tri-pod to make sure it was level with the box. Try and keep tripod in the same place so all your pictures are close to the same.
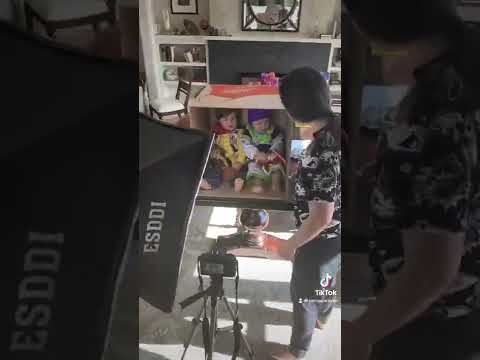
I set up my two photography lights so I had one on each side of the box. If you want to know what photography equipment I use check out my blog post HERE where I list the lights and camera.
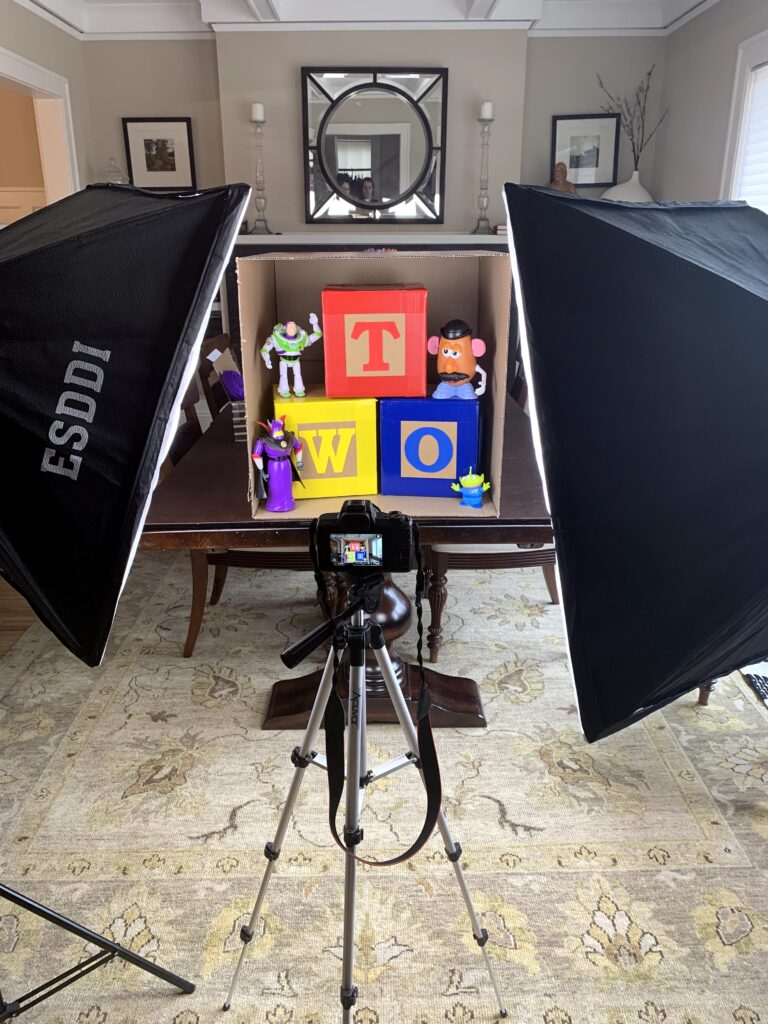
I decided to take some pictures with both of the boys together in the box and some individual ones. The final photo will be 3 X 3 so plan out how you will want it to look and what picture you want in each square. With the middle photo I used the left over number two squares from their other toy story birthday photoshoot which made for a cute middle picture to the final photo.

How to edit the picture
I would say editing is the most important part of this Toy Story birthday photoshoot. You want to make sure it all comes together and looks like they were all stacked on top of each other. I use Canva with most of my editing projects because its so user friendly. If you have photoshop that would be the most ideal way to edit this, but thought I would share a free way to edit with Canva.
Step one: Create new design in Canva
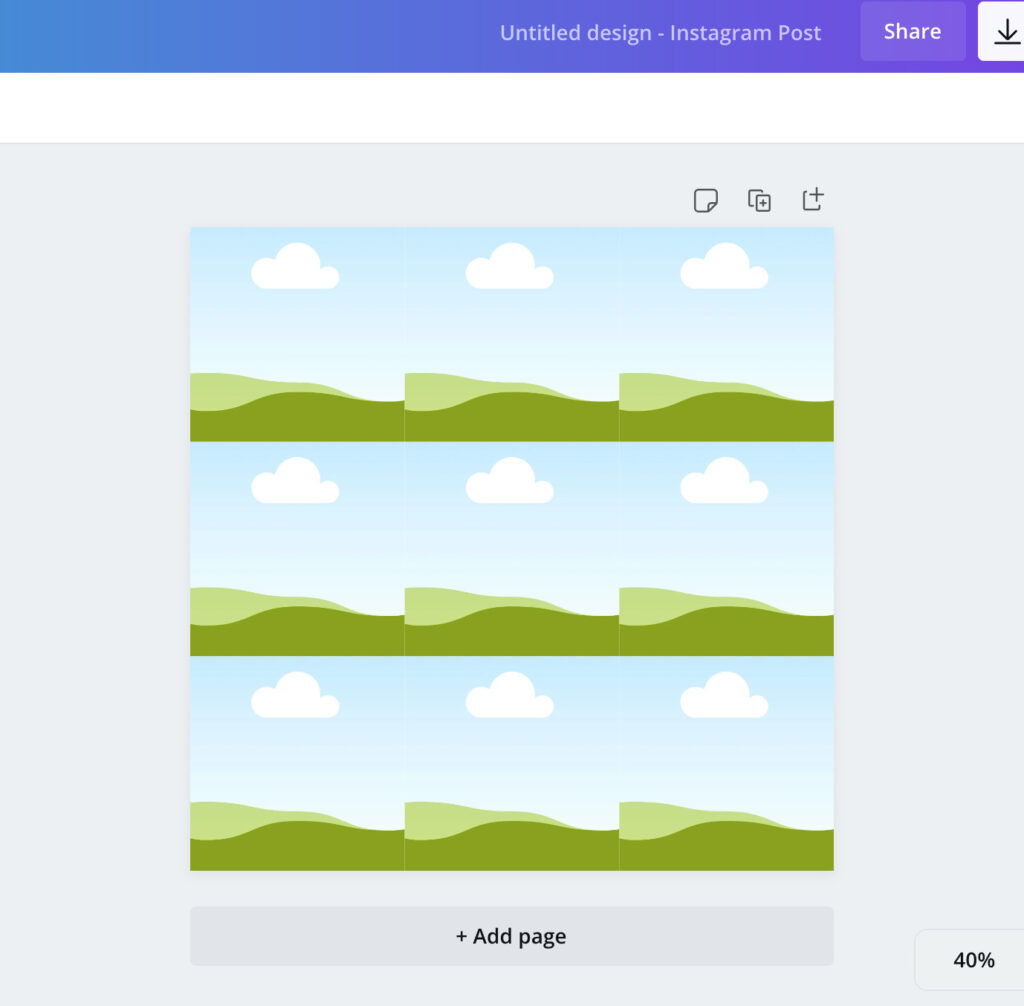
Open Canva and create a new design. You will add your own custom dimensions of 1,080 × 1,080 px . You want a perfect square in order for this to work and those are the pixel dimensions of a square.
Step Two: Use the grid template to make 3X3 picture grid
Once you have created a design you will have a blank square. On the lefthand side you will see an option that says “Elements” click on that and scroll down to the grid option. You will then want to search for the 3X3 grid.
Step Three: Add the picture to the grid
You will want to upload all your photos in the “uploads” located on the left side of your design. Upload your pictures then drag and drop which picture you want to go in which square.
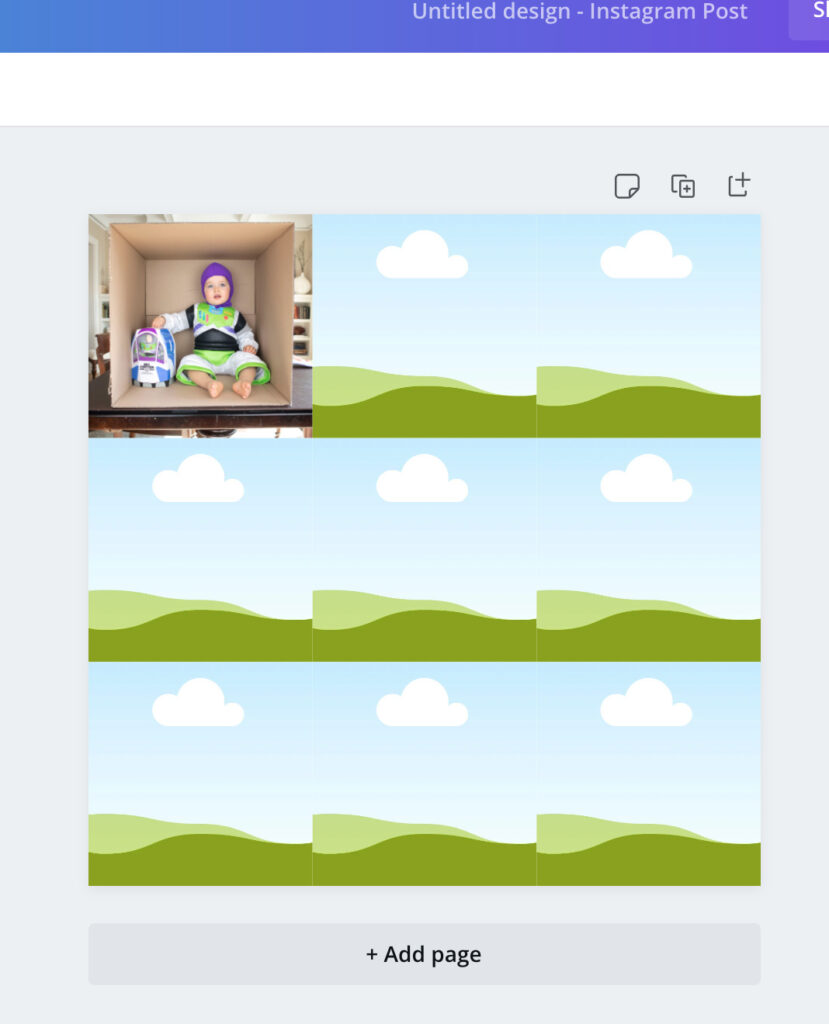
Step Four: Adjust the picture to fit the square
Once you have all your pictures in the squares, you will need to adjust them. You can double click on the picture and drag to make it bigger so the box fits the sides of the grid. It won’t be exact but try your best to line them up.

Step Five: Download
Last step is to download the image in png highest quality. Then you can post or print away to show your friends and family!
Hope you had fun making this and don’t forget to tag me in your results on Instagram. I would love to see them!
This post may contain affiliate links. See my Full Disclosure for further details.
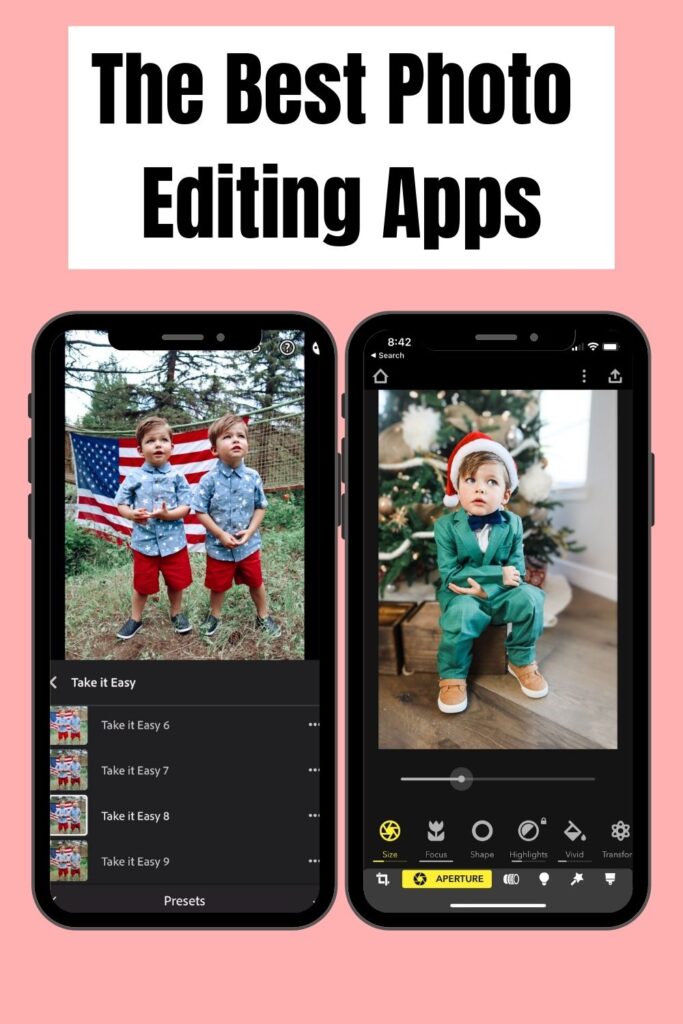
Editing Photos
I put together a list of the best picture editing apps. I started learning to take my own photos to save money. With these picture editing apps you can take any ordinary photo and make it look professional. See my blog post here to see more of my tips and how I edit my photos so you can do the same with yours.
My Camera
This is the best camera for beginners. If you are new to photography or video and want to start off with an easy to use camera, this is the one for you. Continue reading to see what lens I added to this camera to get even better photos!
Photography Equipment For Beginners
I wanted to share the photography equipment I use that can help you take professional pictures at home! Why spend tons of money on a professional photographer when you can take them yourself. This is the best list to start out if you are a beginner.
DON’T FORGET TO PIN THIS DIY PHOTOSHOOT TO YOUR FAVORITE PINTEREST BOARD FOR LATER.
Similar post you might be interested in
DIY Two Years Old Birthday Toy Story Photoshoot
THE BEST PICTURE EDITING APPS FOR YOUR PHONE