How to make a video
If you want to learn how to make a video you have come to the right place. I’ll teach you how to pick a topic, film, and edit so you can have fun lasting video of your family trip or holiday. Once you learn how you will want to record and make more family home videos.
Table of Contents
How to make a video
You don’t need to learn fancy editing to learn how to make a video of your most recent family vacation or holiday. Its so simple and you will be so glad you have them! Follow my steps to learn how to make a video and save those memories!
1. Choose a topic for your video
The first step in how to make a video is to pick a topic. Make the topic simple like Christmas morning, summer vacation, or pool day. If the topic is too broad or you try and fit multiple topics in one video, it can be overwhelming. You might find yourself never finishing the video. Here are some topics I love to make for my home videos.

Topics for family home videos:
- Vacation Video
- Holidays
- Summer
- Birthday’s
- Day in the life
- Pool Day
Summer Video Checklist
2. Film your video
The most important part in how to make a video is filming. I use this canon camera for most of my home videos, but now a days our phones are just as good.
Film a variety of shots
Make sure to film a variety of shots so you have a lot to work with when you go to edit. You don’t want 20 videos of your family walking. Change up your video to make it look more professional. I listed some ideas below of different ways you can shoot some video. For beginners pick a couple and try them out on your next home video.
- Wide Shot (Establishing Shot): Capture the entire scene to establish the location and context.
- Medium Shot: Frame the subject from the waist up, providing a closer view while still showing their surroundings.
- Close-Up Shot: Focus on a specific detail or feature, such as a person’s face or an object.
- Extreme Close-Up: Highlight a very small detail, like a person’s eyes or a specific object’s texture.
- Over-the-Shoulder Shot: Film over one person’s shoulder to show their point of view while also revealing the subject they are looking at or interacting with.
- Point-of-View (POV) Shot: Capture footage from the perspective of the subject, giving viewers the feeling of experiencing the scene themselves.
- Tracking Shot: Follow a subject’s movement by moving the camera alongside or behind them.
- Pan Shot: Rotate the camera horizontally from a fixed position to scan the scene.
- Tilt Shot: Rotate the camera vertically, capturing a vertical slice of the scene.
- Dolly Shot: Move the camera smoothly toward or away from the subject, often using a dolly or slider.
- Zoom Shot: Change the focal length of the camera lens to make the subject appear closer or farther away.
- Static Shot: Keep the camera still and let the subject or action play out within the frame.
- Low-Angle Shot: Film from a lower perspective, making the subject appear more imposing or powerful.
- High-Angle Shot: Shoot from above, which can make the subject seem smaller or more vulnerable.
- Bird’s Eye View: Capture the scene from directly above, offering a unique and comprehensive perspective.
- Reverse Shot: Film from the opposite side of a conversation or interaction to show the reactions of the other participants.
- Cutaway Shot: Intersperse unrelated shots that add context or interest, such as details of the environment or reactions from onlookers.
- Slow-Motion Shot: Film at a higher frame rate and then slow down the footage in post-production to emphasize detail or create a dramatic effect.
- Time-Lapse Shot: Record a scene over an extended period and then play it back at a faster rate, showcasing changes that occur over time.
What camera do I film with?
This is the best camera for beginners. If you are new to photography or video and want to start off with an easy to use camera, this is the one for you. Continue reading to see what lens I added to this camera to get even better photos!
Film B-Roll for transitions
B-roll is a term used to describe secondary footage, often used as cutaway footage, to provide context and visual interest to help tell your story. The term derives from the early days of Hollywood when they used to shoot on film.
I love using B-roll as transitions in my videos. For example: showing a video of the beach before you show a video of your kids playing in the sand at the beach. It helps let your viewers know where you are and creates a great transition.
Do I film vertical or horizontal?
We use to watch all our home videos in a horizontal view on youtube, but once Tik Tok came out it really changed how we film and view our videos. If I’m making a short video for my social media I make sure to shoot all my video vertical. If I’m making a longer video that I want to put on Youtube about our family vacation or summer, I try and film all my video horizontal. If you enjoy watching your home videos on a tv I suggest filming horizontal.
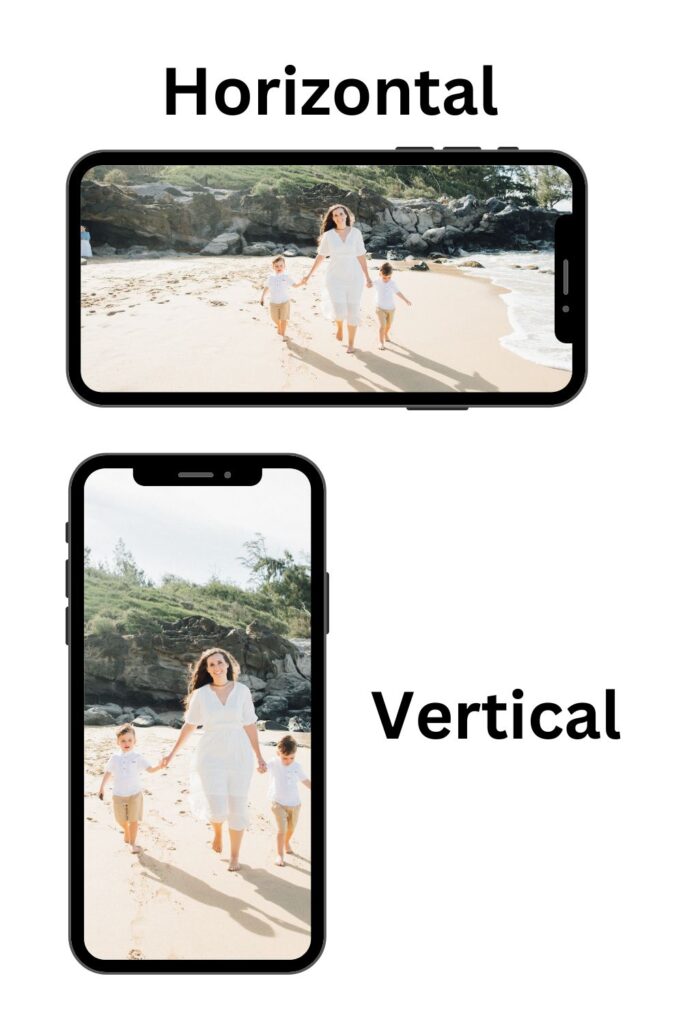
Decide how you want to view your video before you start filming. Once you have decided make sure to film that way. If you do want to add vertical videos in a horizontal video I can show you how I’ve been able to do that and still make it look cool. See the editing section to see how I do that.
3.Upload your video
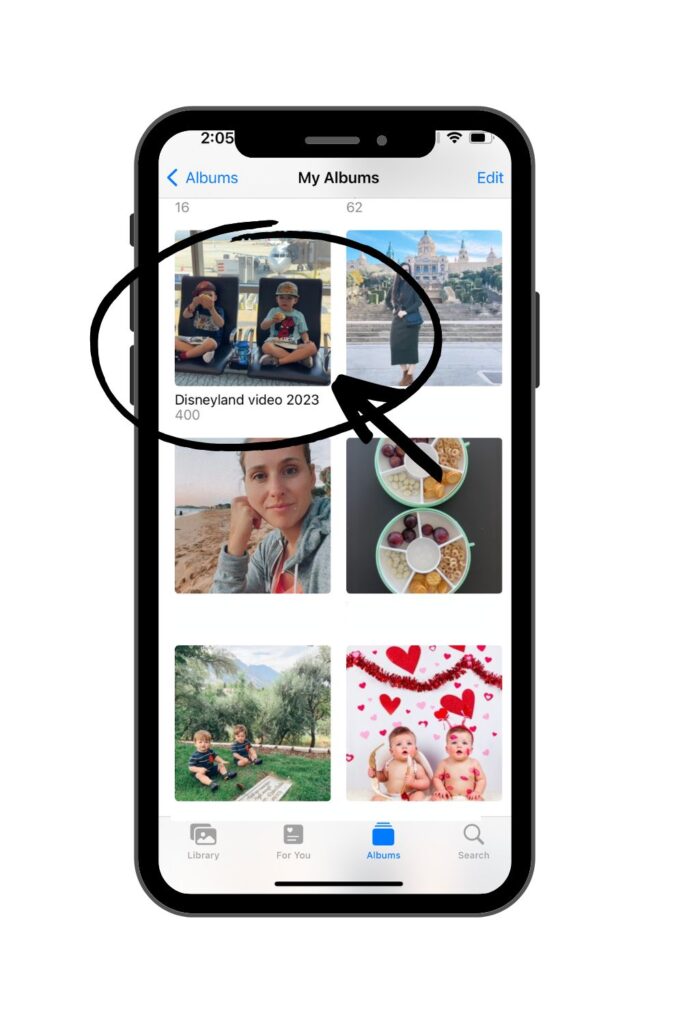
The third step in how to make a video is upload your video. As I film videos on my phone I add them to a saved album titled with what video I am making. This helps me keep them all together and its way easier to upload the videos when it’s time to edit. I love having an iPhone so I can easily airdrop all my videos to computer so I can drag them over to my video editing software and start editing. If you like to edit it on your phone then you don’t have to worry about transferring them to your computer.
4. Music
The fourth step in how to make a video is pick a song. Always pick the song first before you start editing. You want to adjust the videos to the different parts of the song. If it’s a slow part of the song try and fit a video there that is slower and more soft. If it’s a fun loud part of the song add a video of your kids jumping or doing something loud. Match the video with the song. See example below how I matched the videos with the beat of the song. You might need multiple songs for one video depending on how long you make it.
Copyright free songs
If you intend to put your video on youtube and monetize videos, you will need songs that are copyright free. If you just want the video for your own personal use, you can use whatever song you want.
Where to find music?
Copyright free music
- Artlist *This is what I use for all my videos
- Bensound
- Youtube Audio Library
5.Editing
The fifth part of how to make a video is editing. Editing is the most important part, but not always my favorite. I suggest taking your time and not trying to get it all done in one day. See below for more information on what video editing software I use. You can go all out and add fun video effects or clip videos together and add music and call it good. Depends on what you have time for and how you want it to turn out.
Video Editing Software Programs
If you are looking for the best video editing software for your phone or desktop, you have come to the right place. I’m always making home videos after a family trip or short videos for social media and I wanted to share what I use. Hope this helps!
Have an intro video
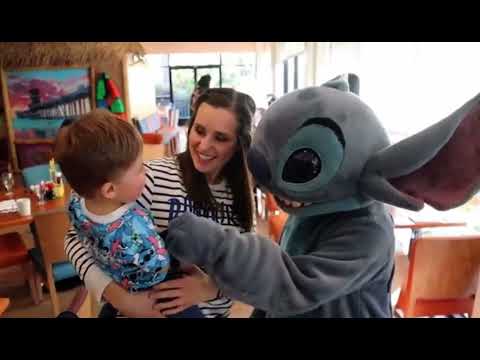
You have a song so now it’s time to edit your video. I like by starting with a fun “intro video” introducing the topic of your video. It quickly tells the audience what your video is going to be about. I like adding words over the top of the video with the topic and year. See the video below to get some different ideas of what type of intro video you would want to do.

Divide video into categories
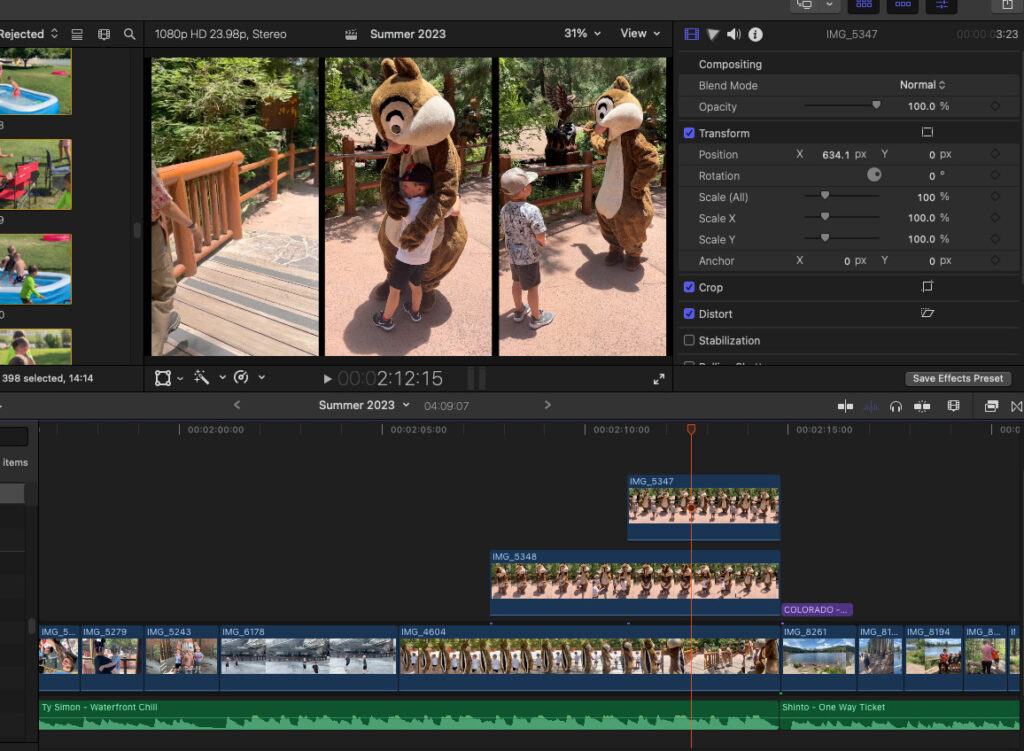
I also like to divide my video into categories. I just made my Summer 2023 video and I organized it by location. The first third of the video was our time here in Utah, then I did Disneyland, and then ended with our time in Colorado. It’s easier for me as I edit when I have so many videos. You could also categories it by events, days in your vacation, etc. Watch video below for example.

Add effects
If you want you can add fun effects and fun transitions between videos. How one video gets darker to transition into another. There are so many fun idea! Depends on how much you want to do.
Fit vertical in horizontal
If you have vertical videos and want to somehow fit it into a horizontal video I have learned a couple ways you can do it.
One option: Duplicate the video and make the one behind bigger
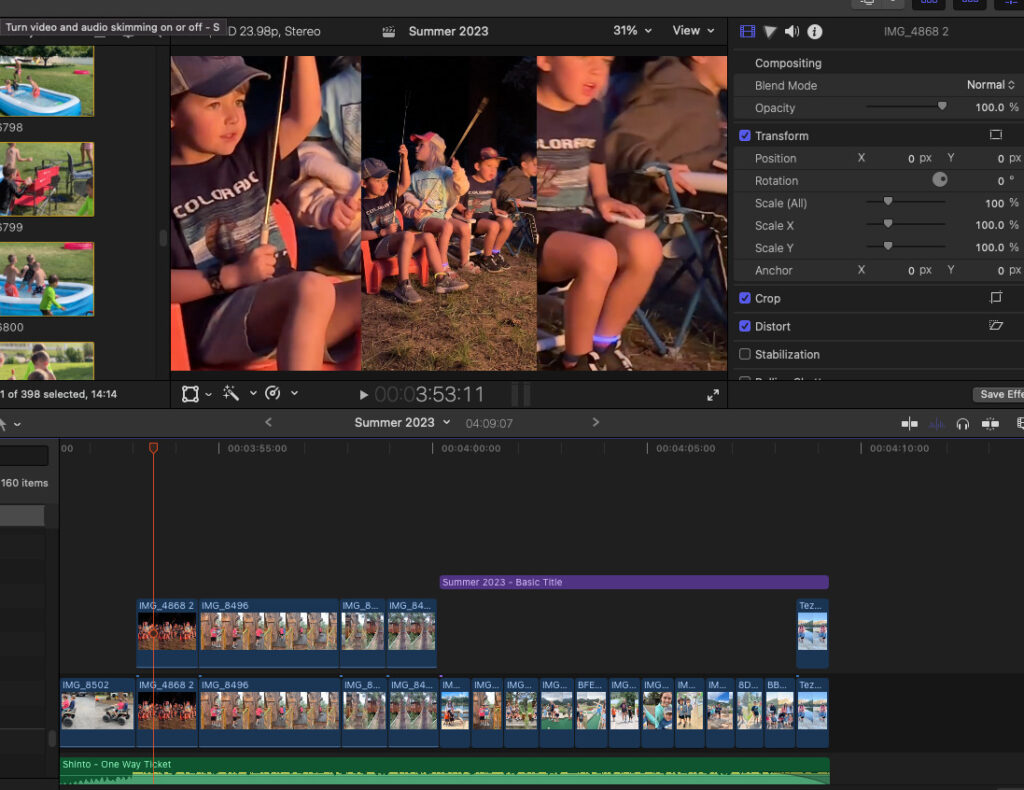
Second Option: Have three vertical videos going at the same time. See example in the summer 2023 video above.
6. Preview and make final edits
The sixth step in how to make a video is previewing. You have to preview your video a lot before you download so you might sick of the song you picked by the end of it. Make sure the sound syncs well with the video clips. You want everything to look well before downloading.
6. Share your video
The last step in how to make a video is sharing! I share all my videos on youtube so we can watch it on the tv. You can also just keep it on your phone and cast it to the tv. I put all the videos on my kids iPads so they can watch when they want.
Watch some of my videos to get ideas!

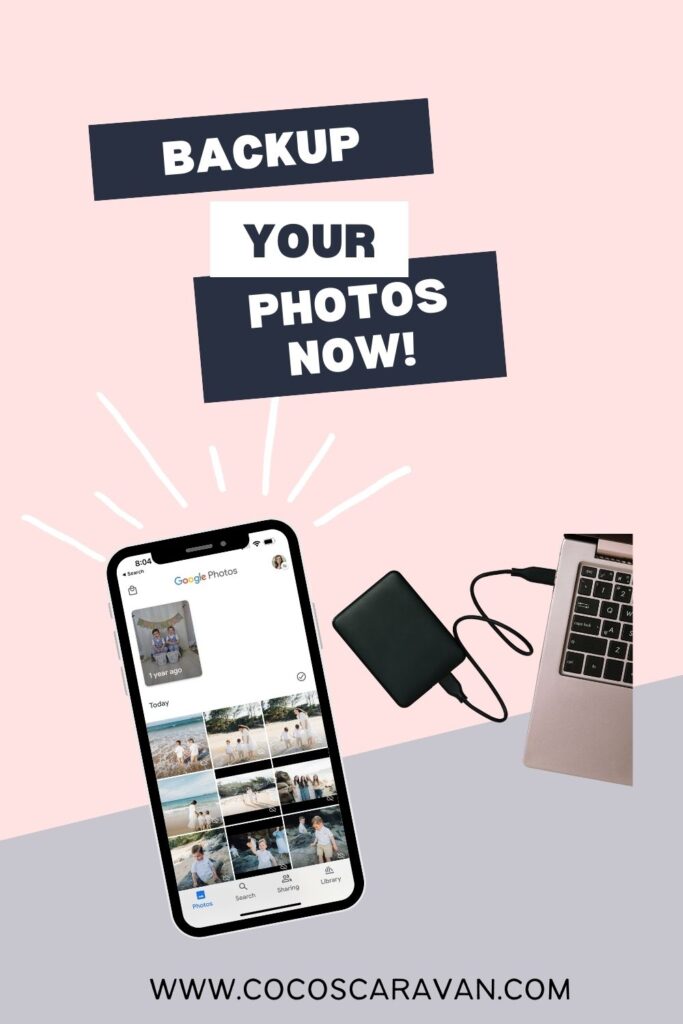
Don’t forget to backup and save your videos!
This course will help you organize all your digital photos and videos. I will show you how to back up your photos to a hard drive and to Google Photos. By the time you finish this course all your photos will be safe and backed up physically and digitally. You will know where they are and be able to view them when you want. You will be set up for automatic back up so you will never worry about losing a photo again!