
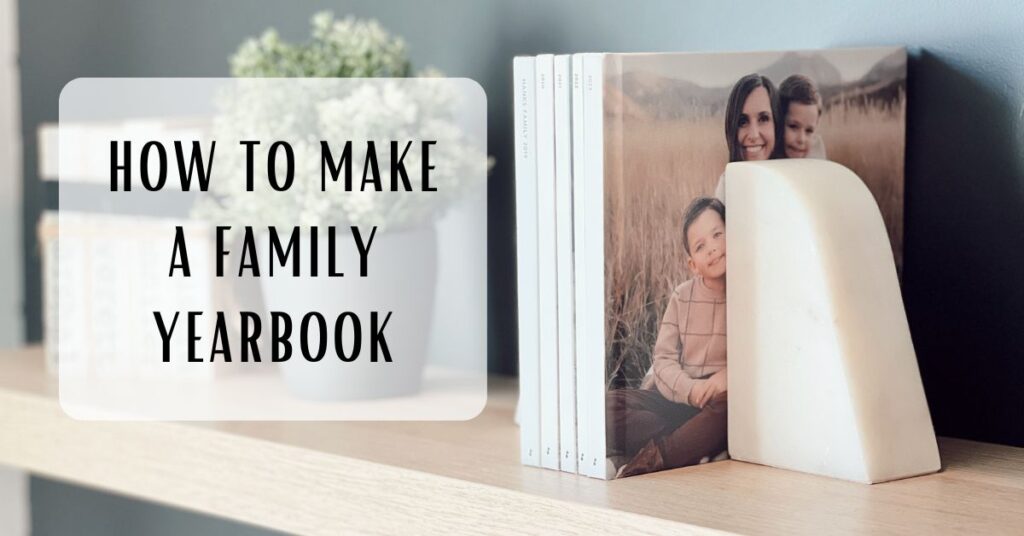
Ultimate Guide to Crafting a Stunning Family Yearbook
Discover the easiest way to craft a beautiful family yearbook with Chatbooks. Picking a software, design stunning layouts, and preserve your cherished memories effortlessly. Start creating your timeless keepsake today!
In this blog post I will show you how to create a family yearbook using Chatbooks program. Explore the complete review of Chatbooks on this blog post for further insights.
Table of Contents
Why its important to have a family yearbook
Having a family yearbook is so important because it keeps all our best memories in one place. We take so many photos on our phones, but never look at them again. My kids never get to see any of the photos I take so they especially love having a family yearbook. After losing my husband I learned the high value of a photo. You can never have enough and being able to preserve those moments in time mean more than you will ever know.

Choosing a Software program?
When selecting a software program to create a family yearbook, prioritize ease of use and familiarity to ensure a seamless experience. Opt for a program that aligns with your preferences and offers user-friendly features, as this will make it enjoyable to use consistently year after year. Additionally, consider factors such as layout customization options, photo editing capabilities, and the availability of templates to streamline the creation process and bring your family’s memories to life effortlessly.
What software program I use?
I choose Chatbooks for creating our family yearbooks because of its simplicity and convenience. I love the app and how easy it is to use. I also love their customer service, they go above and beyond to help. You can continue to read my full review HERE.
Get 20% off with my code
First time users get 20% off with my code. Click below to get 20% off!
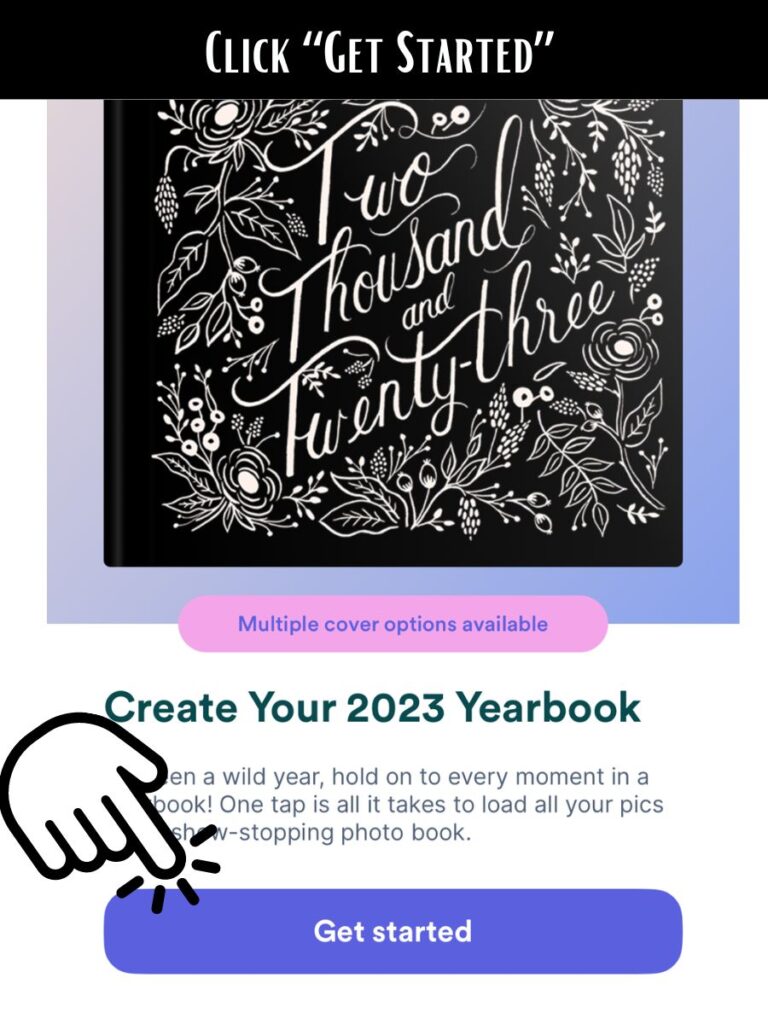
Download the Chatbooks app
Download the app and make an account with Chatbooks. You will want to make an account so you can have all your projects saved and reorder books if you lose them or want more. Open the app and scroll down until you find “yearbooks.” Or select “all projects” and you will find yearbooks there as well.

Upload your photos using the Chatbooks app
I love making a family yearbook using Chatbooks because their app is so easy to use. My photos are all on my phone already so I like to upload my photos from my phone using their app. As you can see below you have many different ways to get photos onto chatbooks I just find it easiest to upload from my camera roll.

Start selecting your favorite photos from each month that year. You can always delete photos later once you are editing so don’t worry if you feel like you are adding too much when first selecting.This is the longest process of making your family yearbook. I like putting on a show while I sit and select photos.

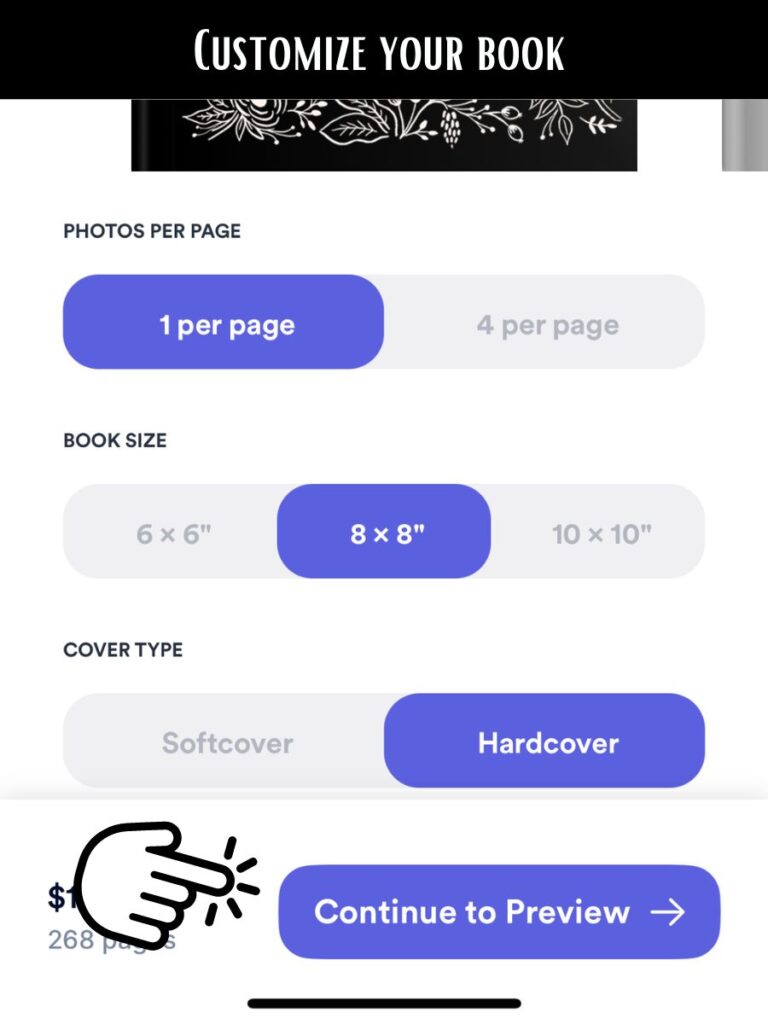
Customizing Your Book
Now it is time to customize your book by size and cover type. The first thing you want to select is the photos per page and you want that to be “1 per page” This will make it so much easier to select photos and put them into a collage when you’re editing the inside pages of your book. I make my yearly book 8X8 with a hardcover. I like using hardcover for my yearly book so I can display them on my shelves in my living room.
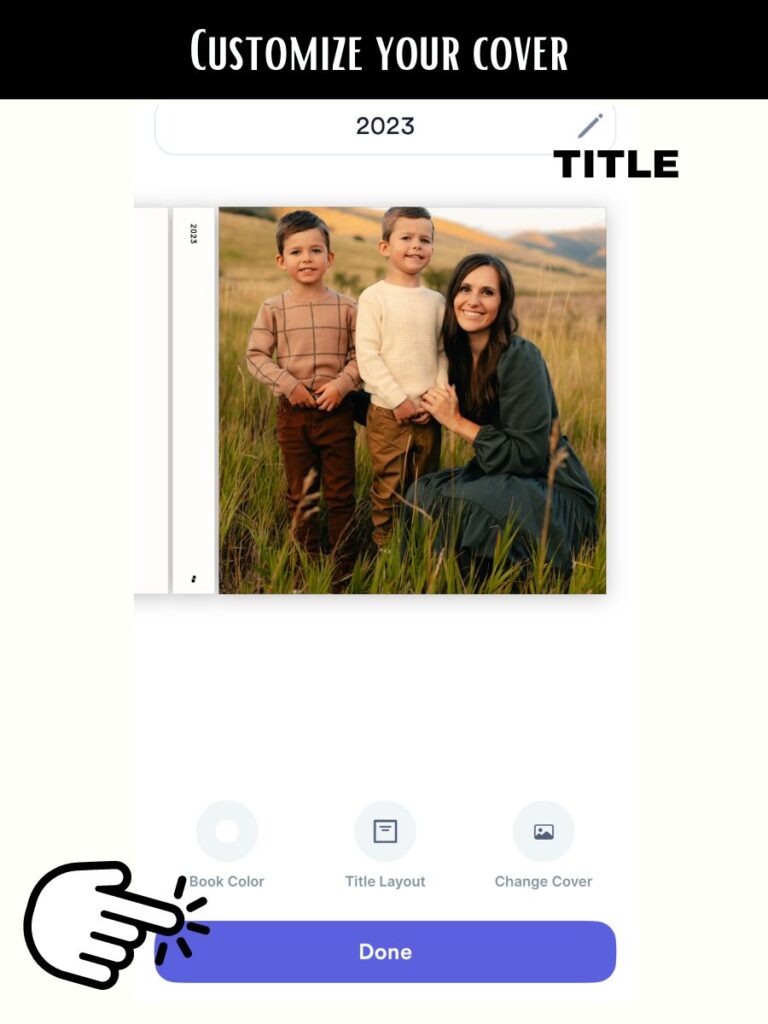
Choose Cover and Color
Do not forget to design and give your book a title. I just title mine the year and that will show up on the binding. With my yearbooks I want them all to look the same because I display them on my living room shelf. So whatever you do one year make sure to do that the same every year if you want a unison look.
Designing your page layout’s
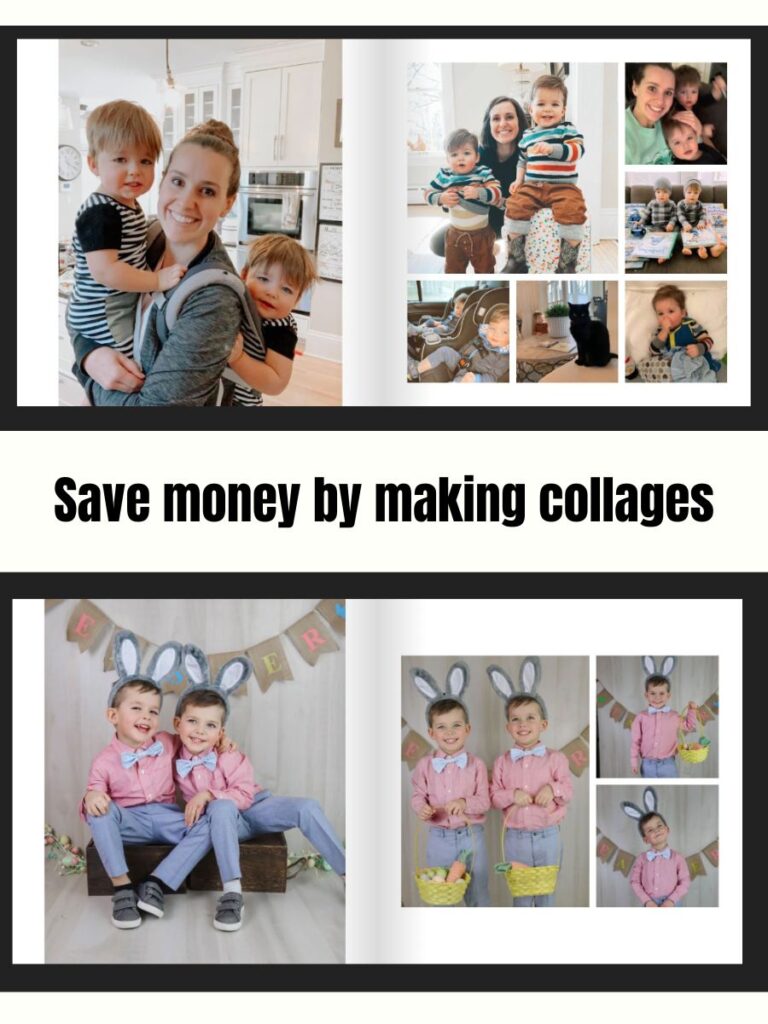
This will be the most time consuming step of making your family yearbook. I enjoy doing this part on my computer more than the app, but you can do it in both places. The more pages you have the more expensive the book will be. I like to select multiple photos and make a collage to fit one page so save money. Select multiple photos and then select “collage” and they will all fit on the same page. You can rearrange the pages however you like.

Preview and Add to Cart
Before finalizing your album purchase, it’s essential to double and triple-check every detail to ensure it meets your expectations. Start by carefully reviewing each page for any errors or inconsistencies in photos or text. Pay close attention to layout and design elements to guarantee a polished finish. Additionally, confirm that all desired photos are included and correctly positioned. Once satisfied, don’t forget to apply my discount code (cocoscaravan) during checkout for an exclusive 20% off your order. Happy album creating!
Pin this to Pinterest to find later
