
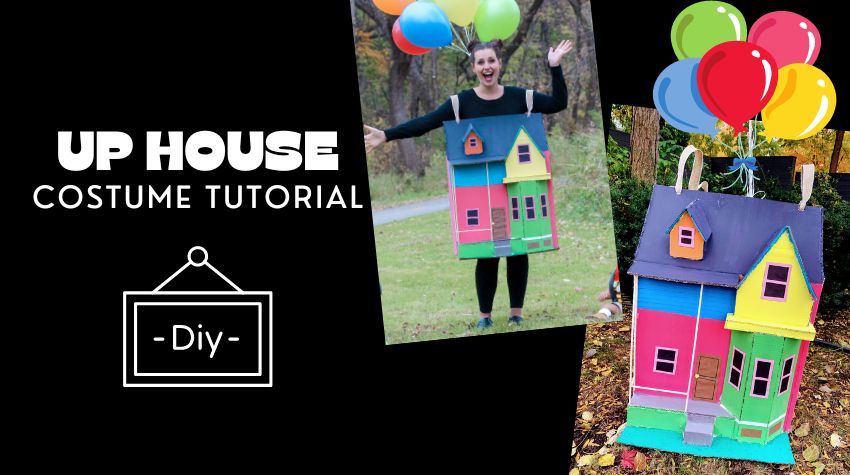
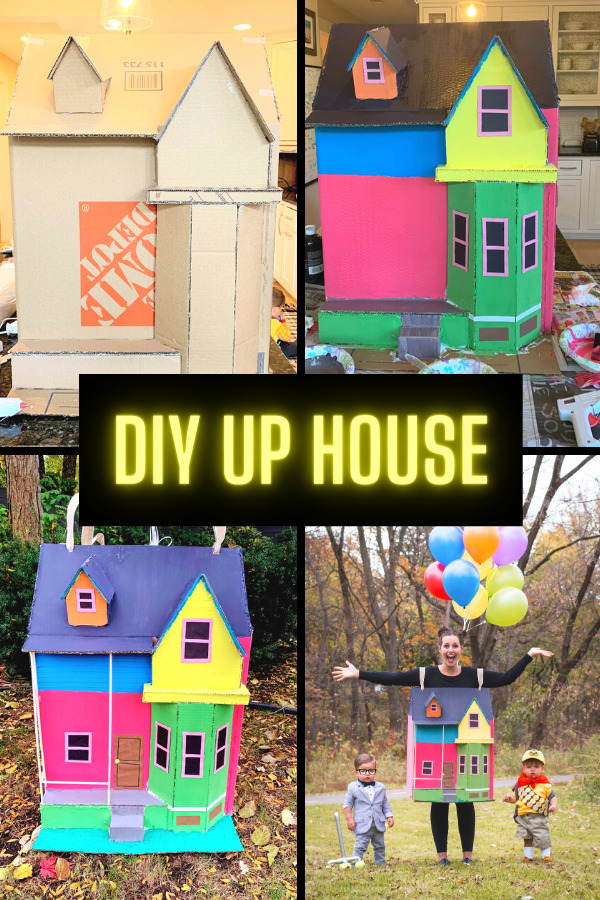
Tutorial on How to Make the Up House Costume
If you’re looking for a costume idea for this Halloween, the Up house costume can be such a fun and cute idea! Last year when I decided I wanted to be the Up house I looked everywhere for a tutorial. I found lots of pictures, but nowhere that explained how they made it. So I made sure to document my process so that you could make it yourself!
I love making my own costumes and doing photoshoots and I knew this would be such a fun idea for Halloween. If you want to see some of the other DIY photoshoots I’ve done check them out HERE.
Table of Contents
Russell and Carl Costume
Everything you need to make this adorable DIY Russell and Carl Up costume. I made sure to include where I got all the materials and how you can put it together yourself!
Materials Needed
- 1 Extra Large Box
- 1 Small Book Box or Amazon Box
- Acrylic Paint (colors of the up house)
- Paint brush
- Wooden Sticks (front porch poles)
- Color Construction Paper
- Glue Gun with glue sticks
- Ribbon
- Balloons
Steps to create the Up house costume
Here are all the steps you need to create the Up house costume. I tried my best to explain everything and even added some pictures. If you have any more questions comment below and I will try my best to help you create the perfect Up house costume!
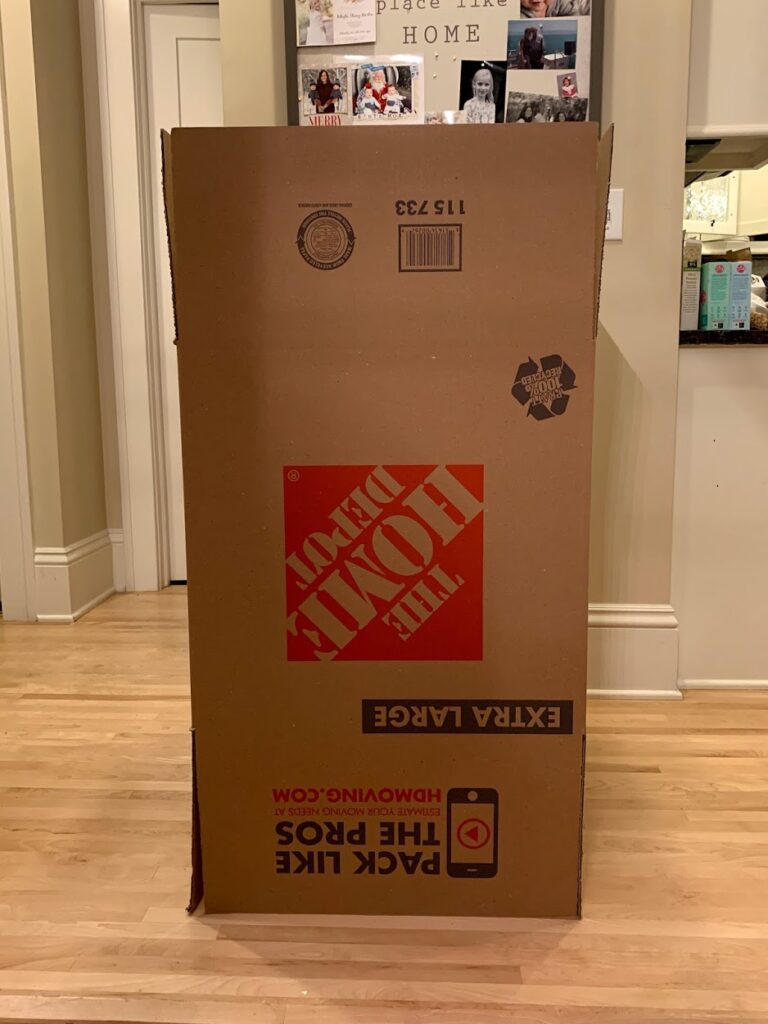
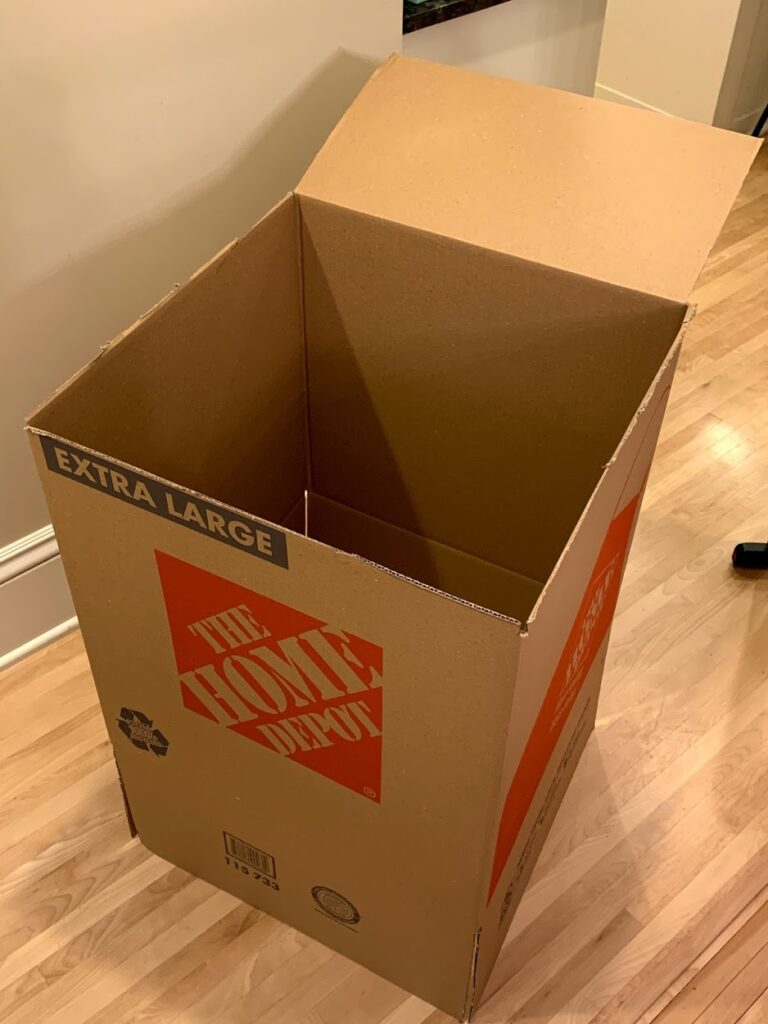
Step 1: Buy Box
I went to Home Depot and bought an Extra Large cardboard box. You can use pretty much any box you want, but make sure you can fit inside comfortably before you start! I wanted the box to cover most of my body, but I’ve seen people do smaller houses as well. It all depends on what you want!
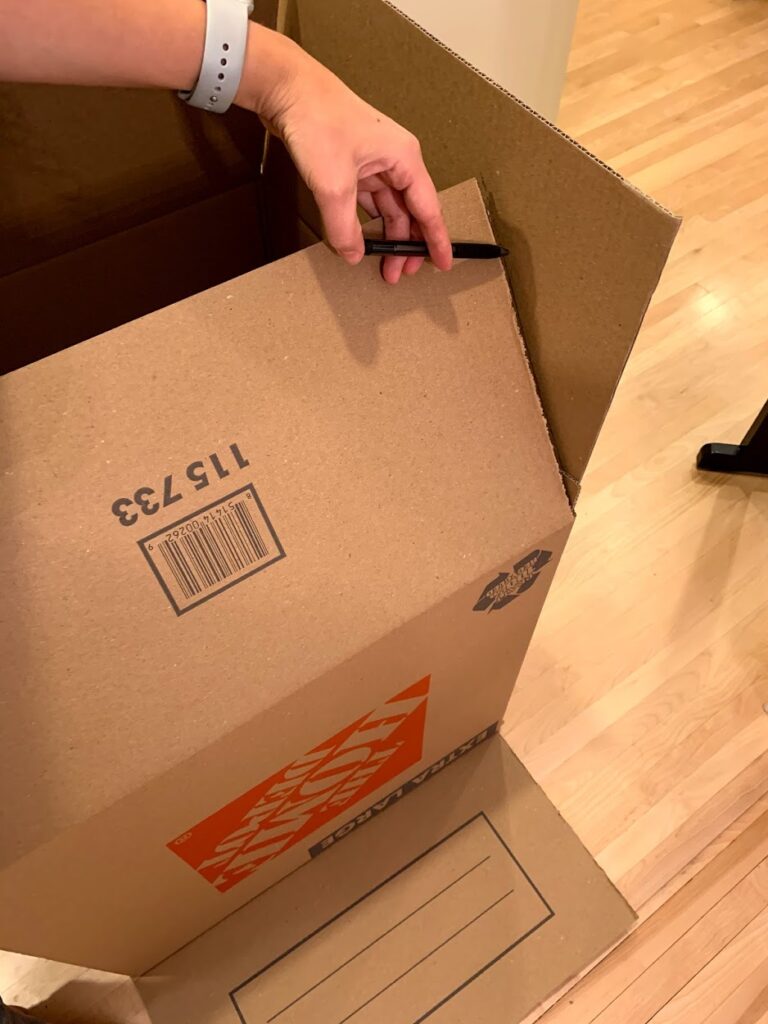
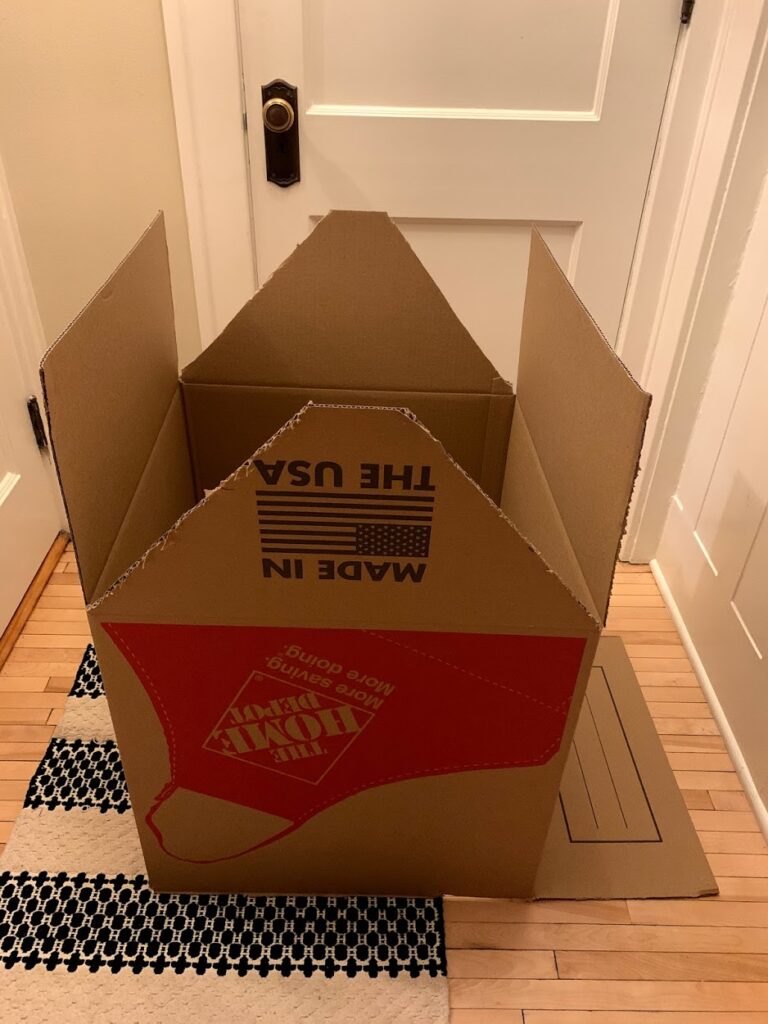
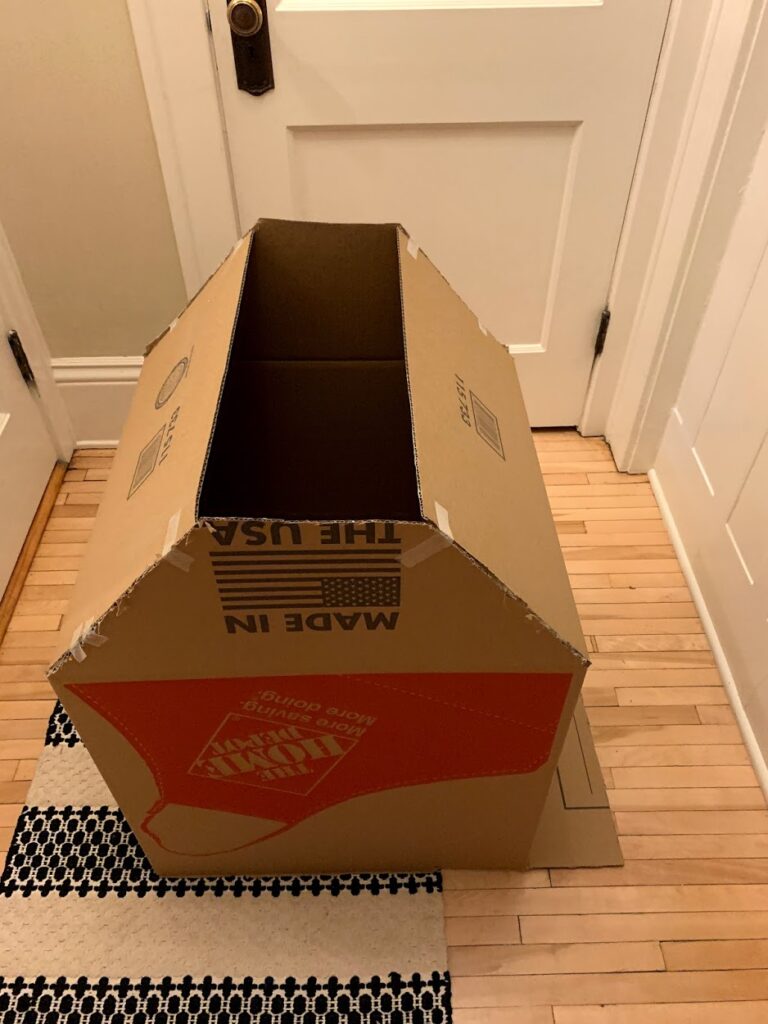
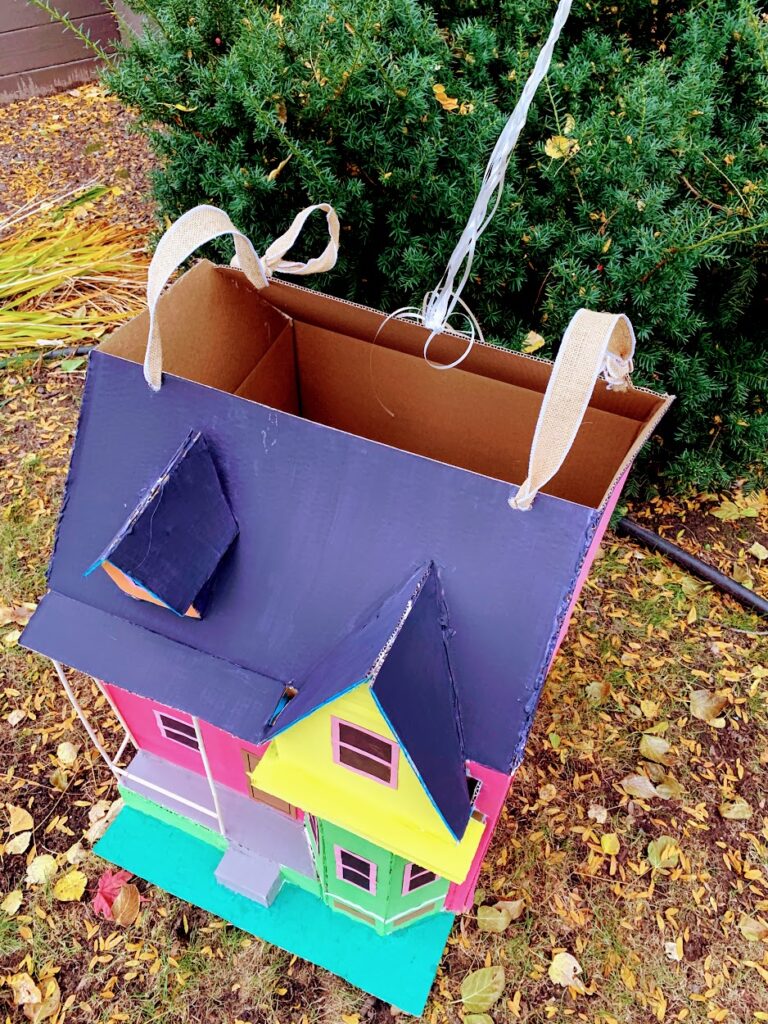
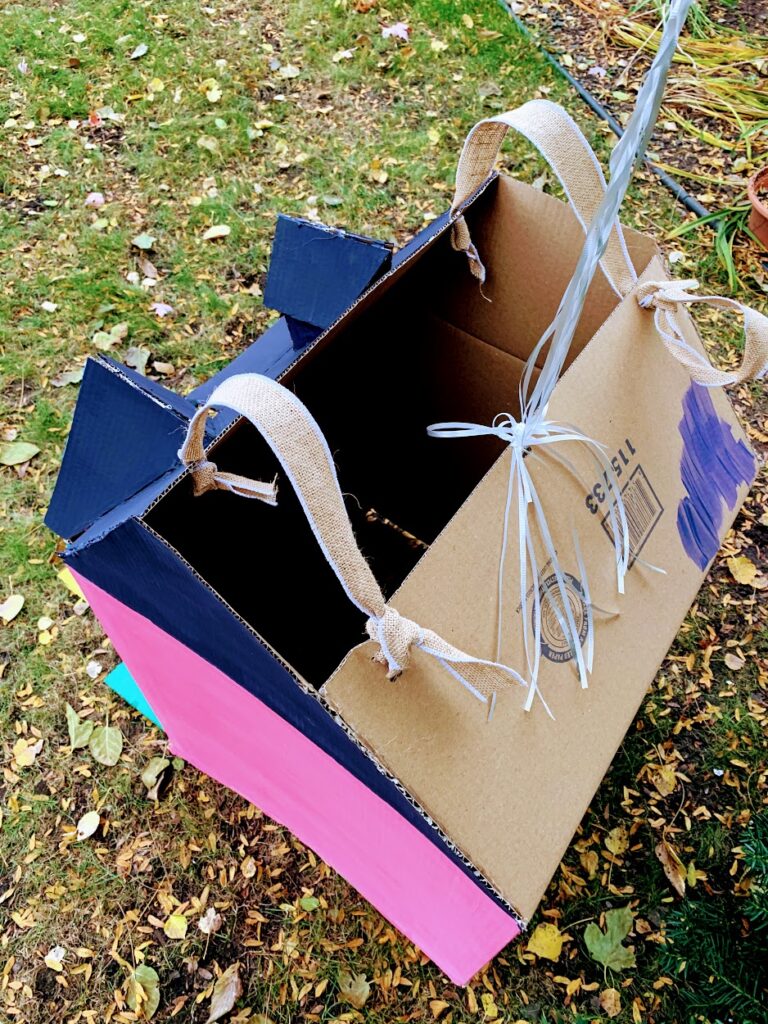
Step 2: Cut three sides off the bottom
Take an exacto knife and cut three of the four flaps off the bottom of the box. You want to leave one flap because this will be the front yard of your house.
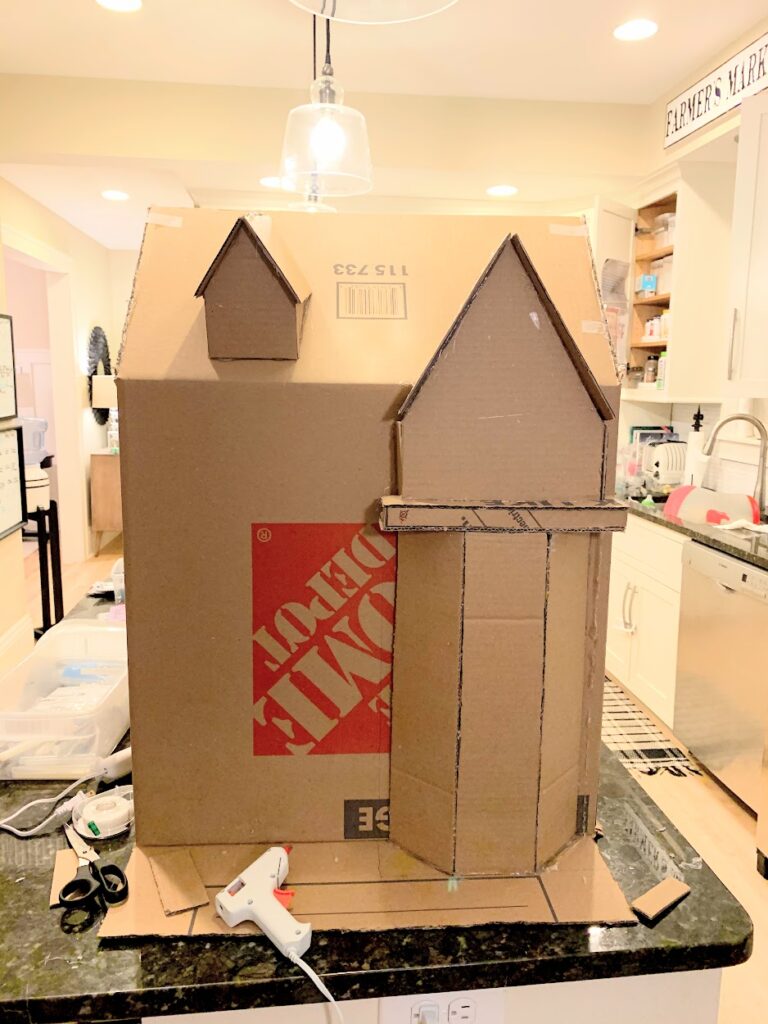
Step 3: Make the roof
You want the slanted part of the roof to match up with the front of the Up house. So make sure you get that right before you start cutting.
You also want to make sure there will be enough room for you to fit in on the top. So make sure you don’t bring the two flaps too close together or your shoulders won’t be able to fit through. Once you have figured that out, use a pen to mark where you will cut.
Once you have marked with a pen you can start cutting.
I taped the edges together or you can use glue as well. I used a glue gun for most of this project and everything stayed well!
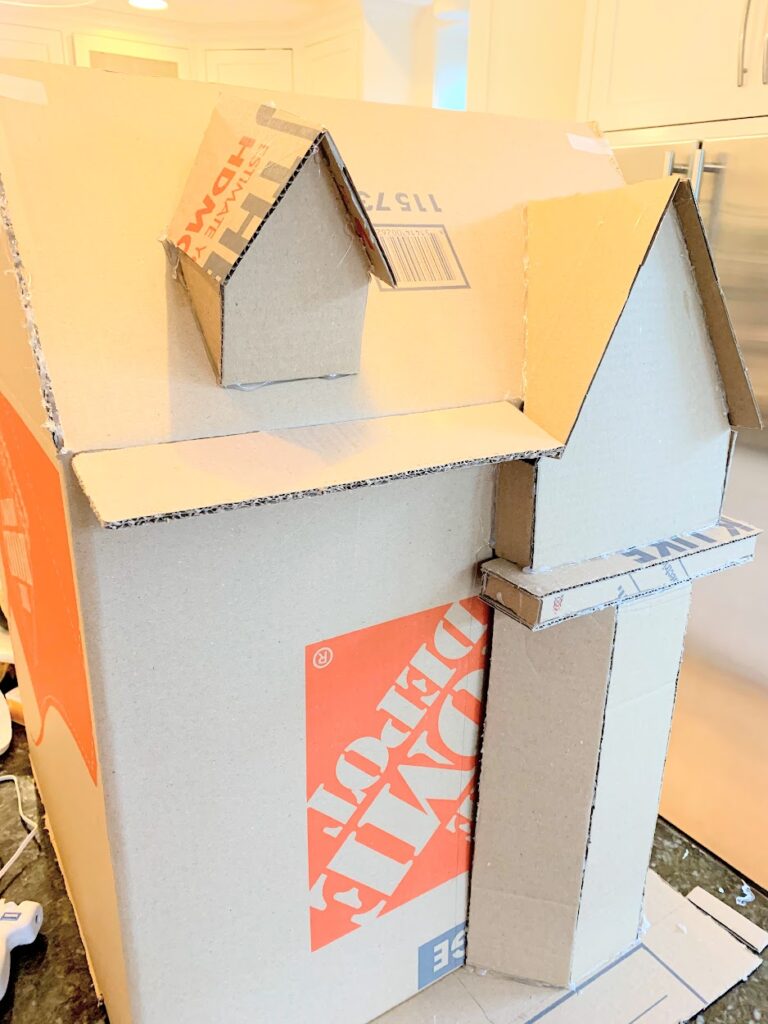
Step 4: Front of the house
Make sure to save the pieces you cut off from the original box. You will need those to make the front part of your house. I bought an additional book box as well to make sure I had enough to complete the front. Used amazon boxes would be perfect for this part as well!
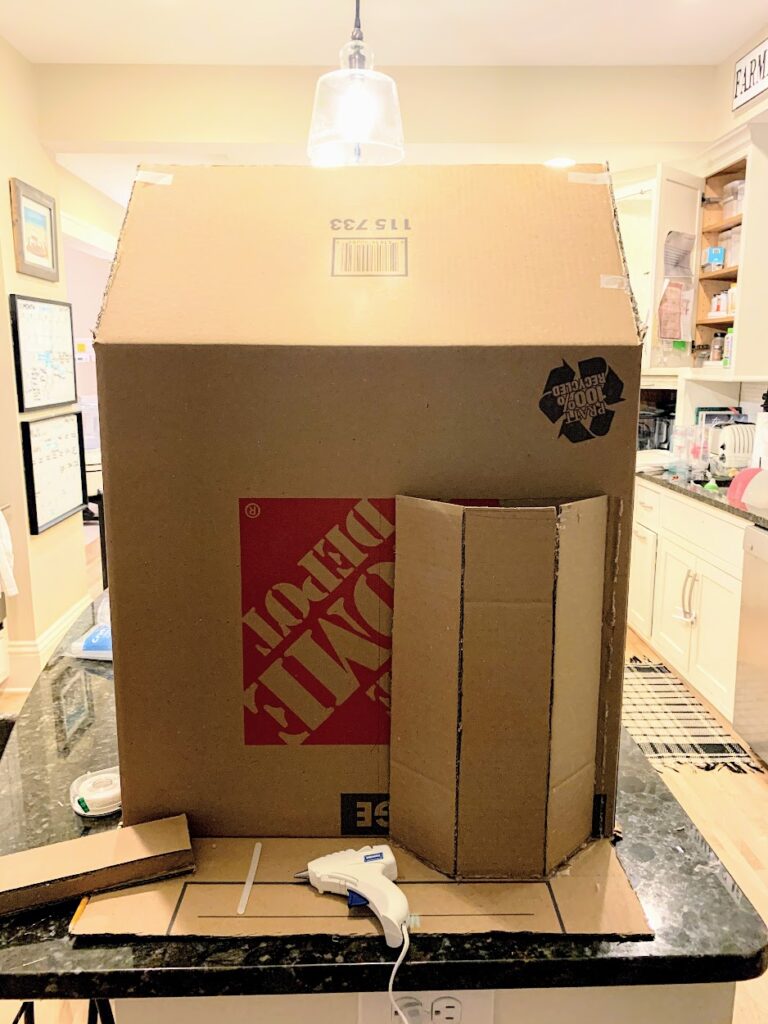
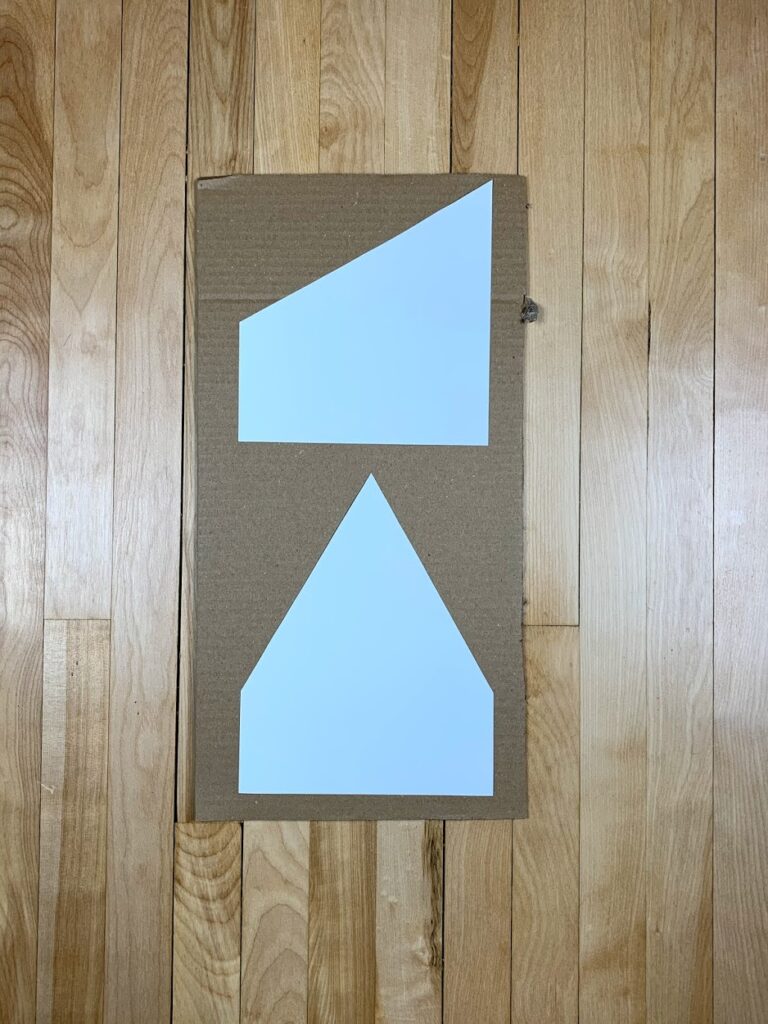
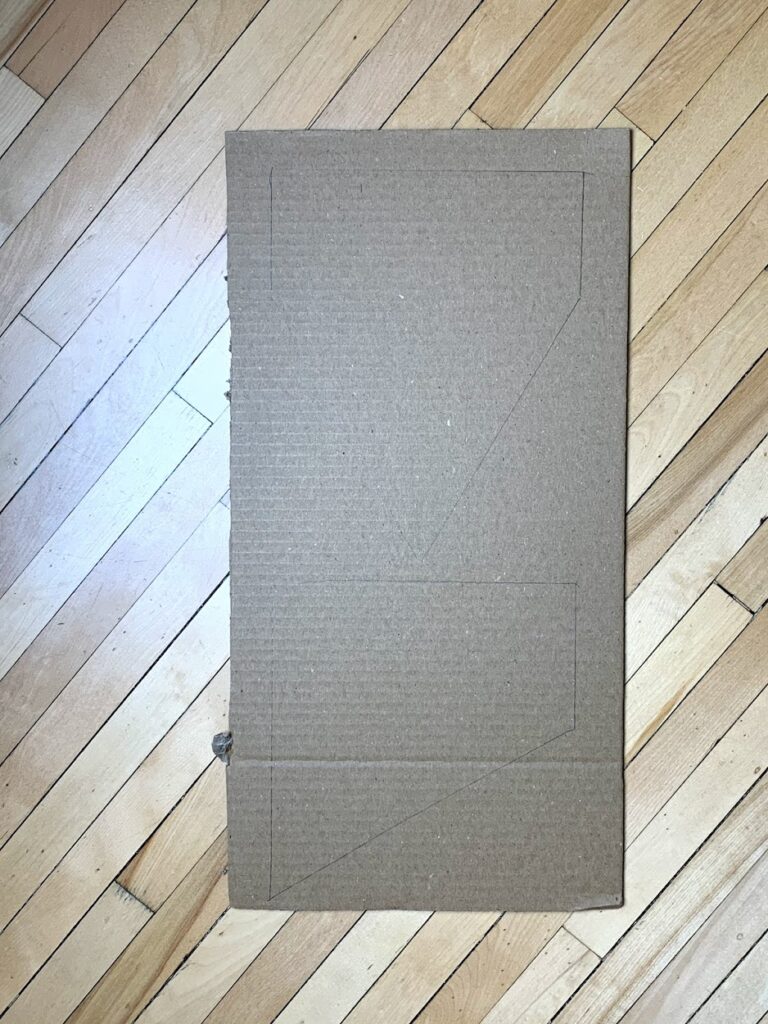
This part took a lot of trial and error to get just the right pieces for the front. I would first cut out pieces on white printing paper and see how it would look first and then trace it on your extra cardboard pieces. After you trace the white paper you can cut it out and glue it on the front. I started with the front window panels and worked from there.
This video also helped me a lot to figure out the angles of the front roof windows. It can be tricky with how they fit on the slanted roof so this might help you!

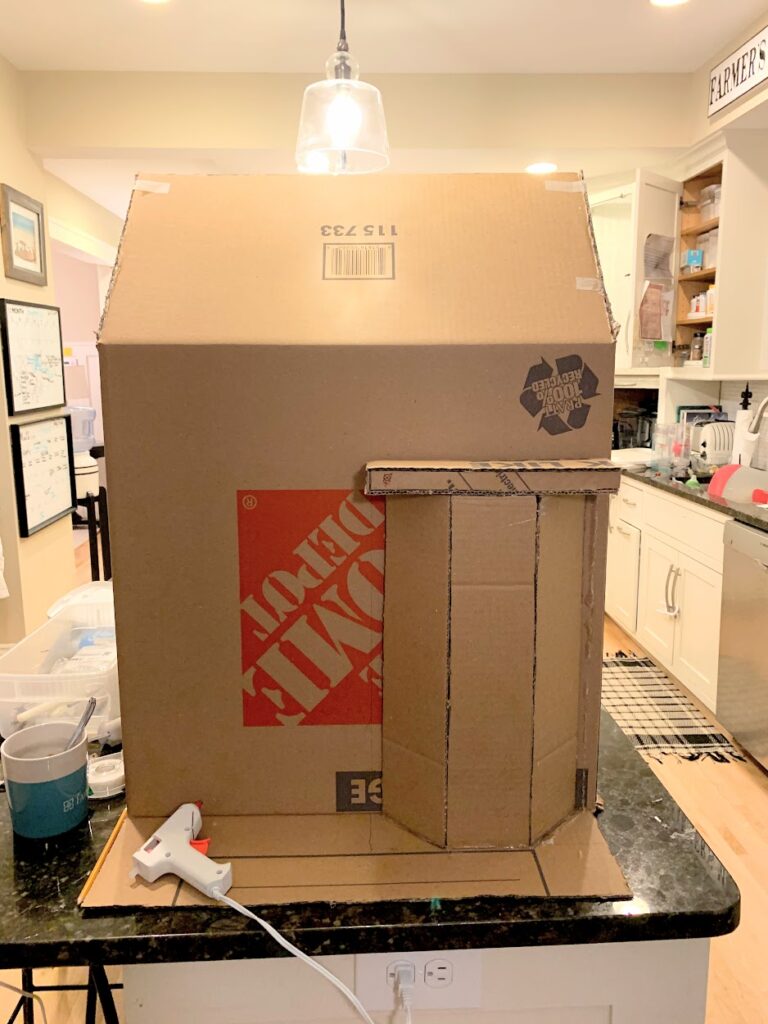

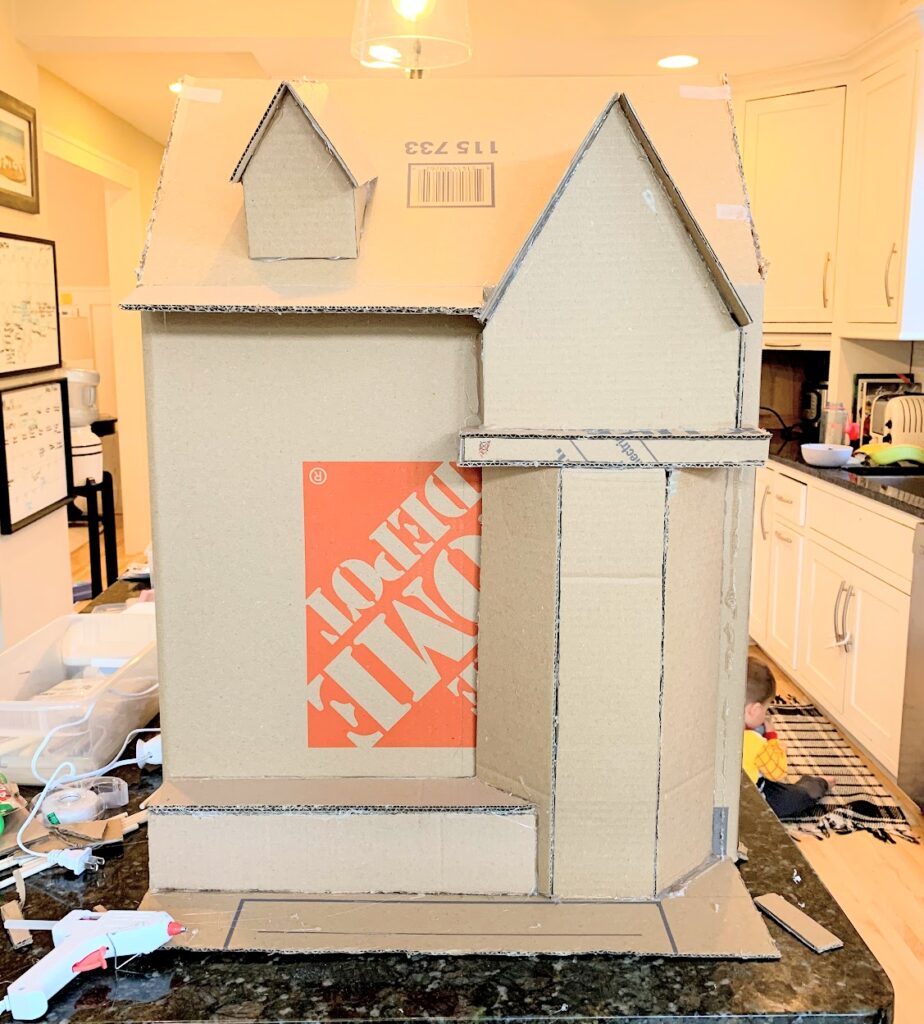
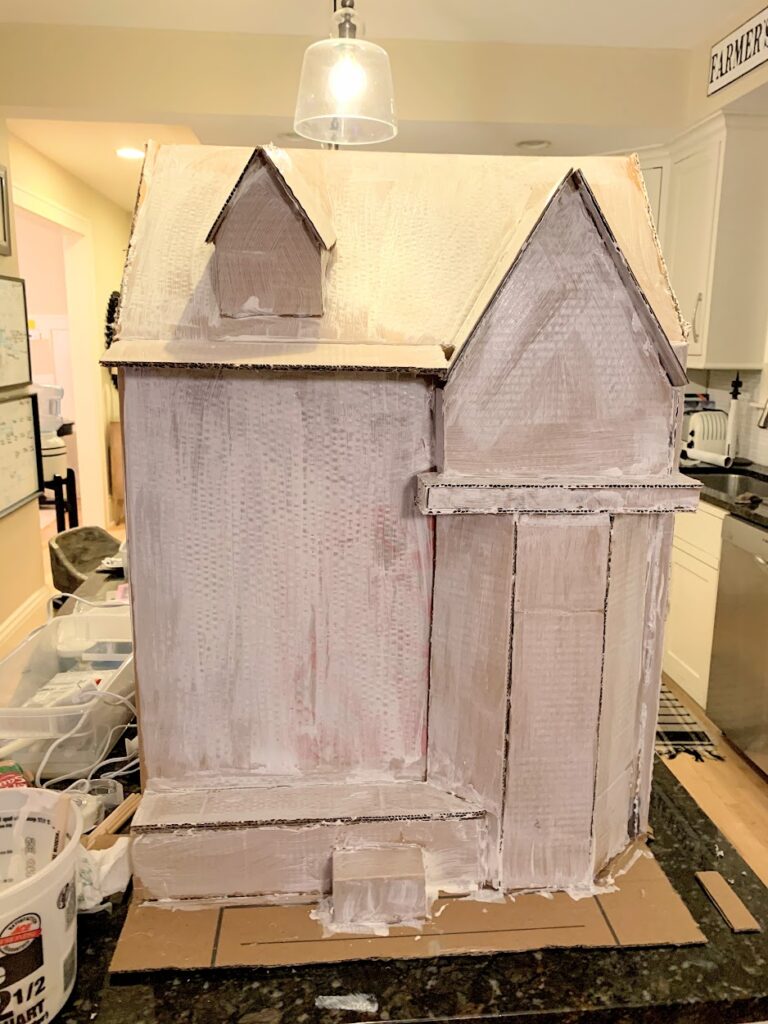
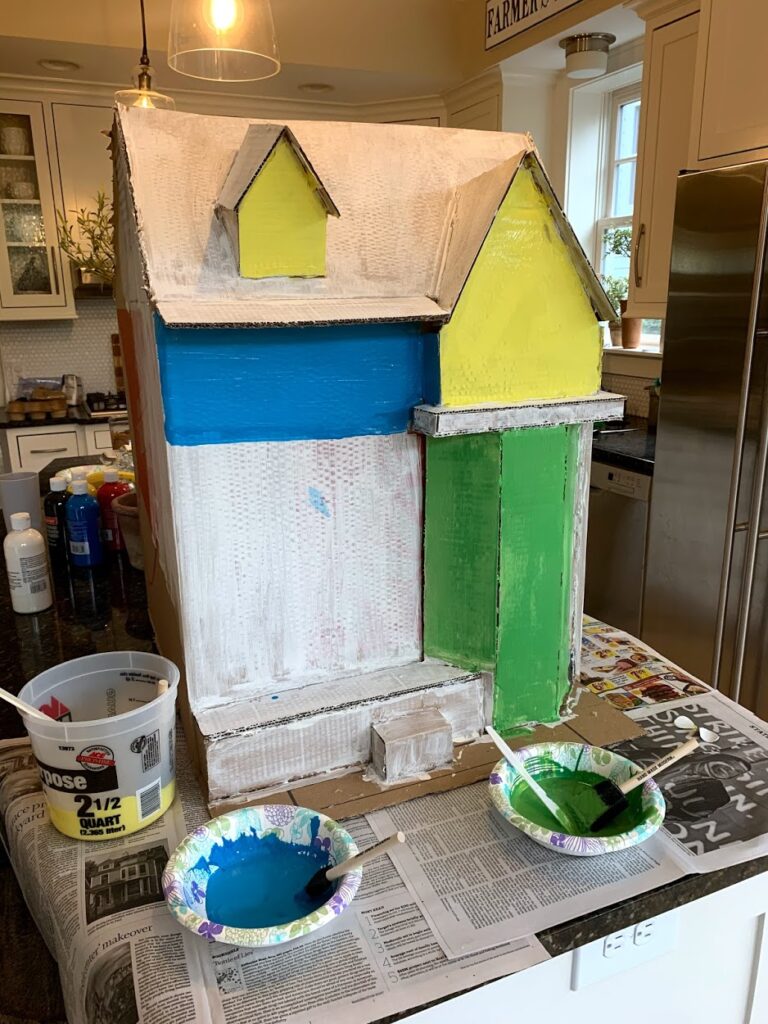
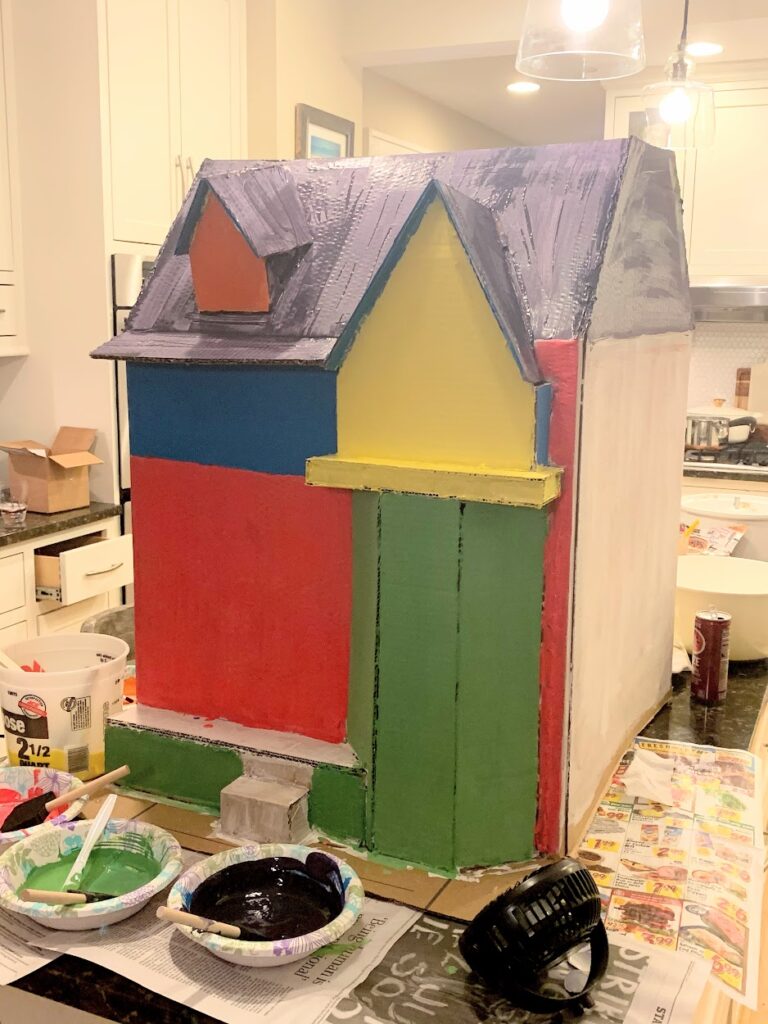
Step 5: Painting
I first started by painting the whole box white so it would be easier to add the different colors on over it. I bought the wrong paint which made it hard to stick to the cardboard and I had to do many layers. I would suggest getting matte acrylic paint.

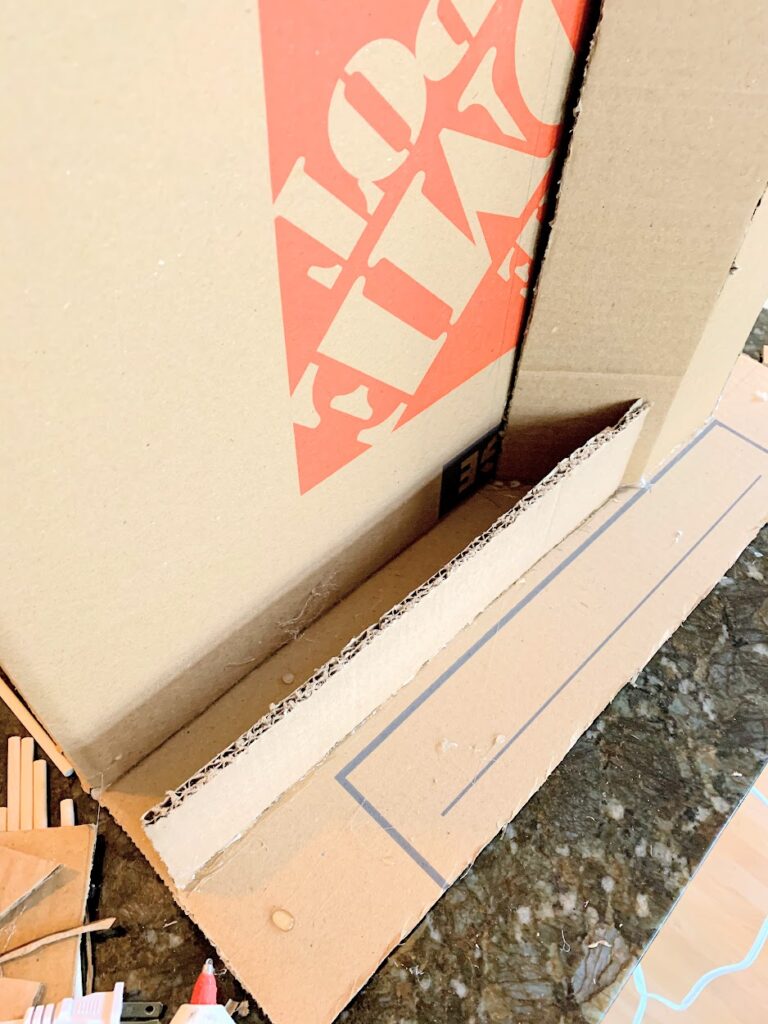
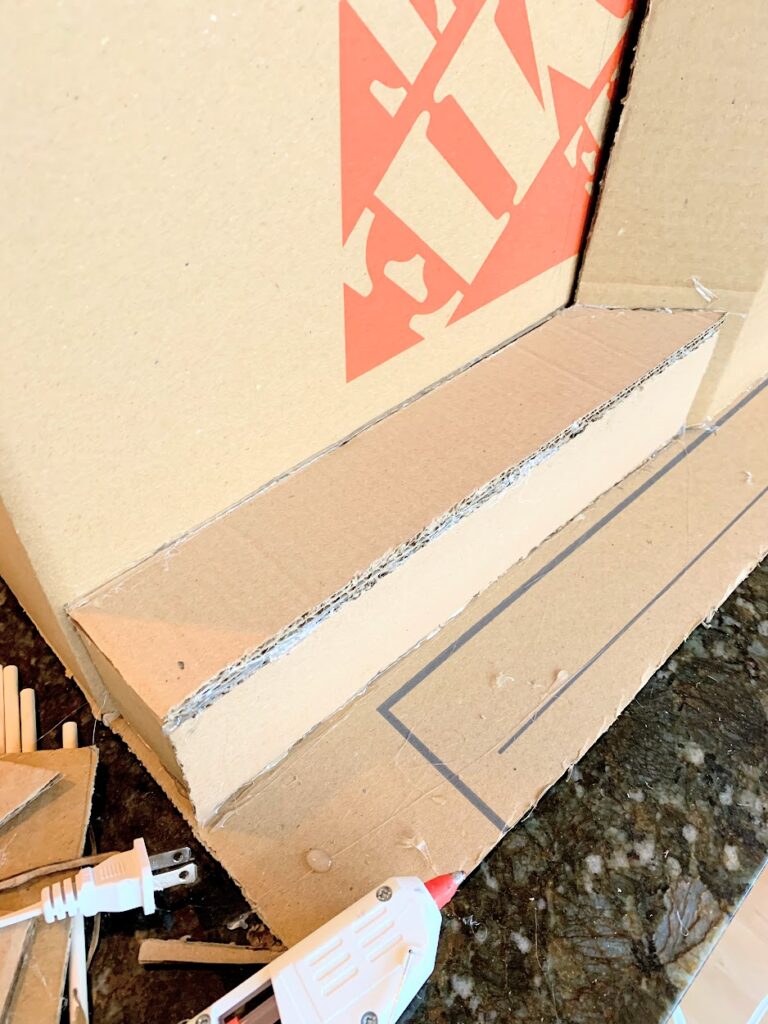
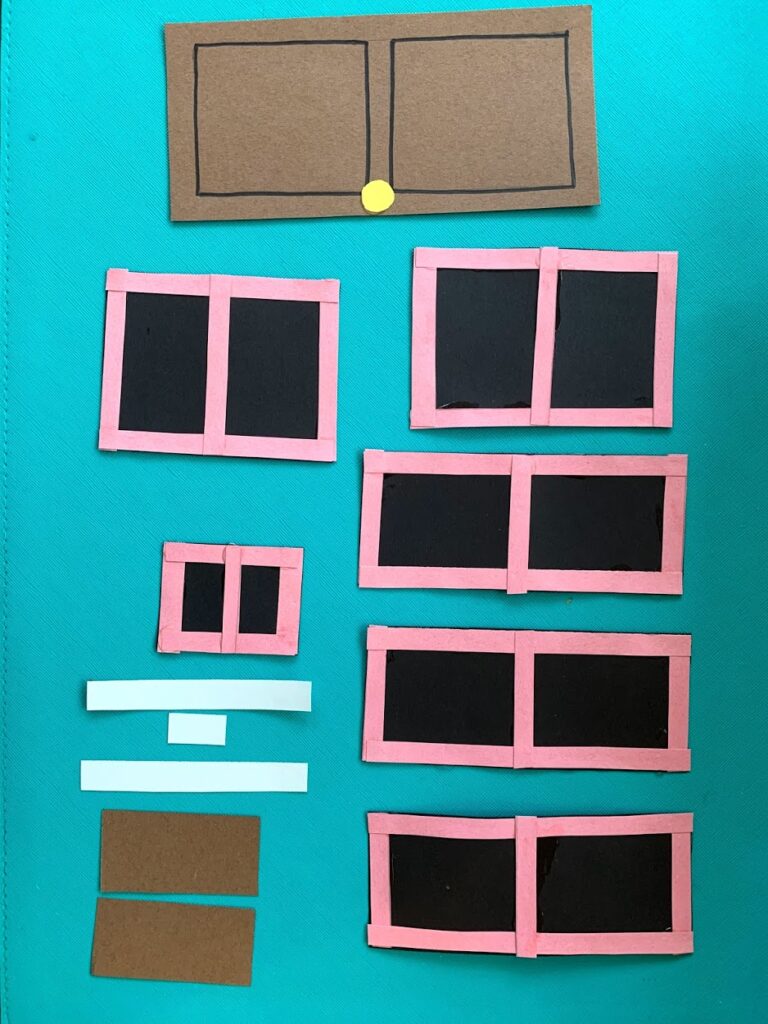
Step 6: Windows and Porch
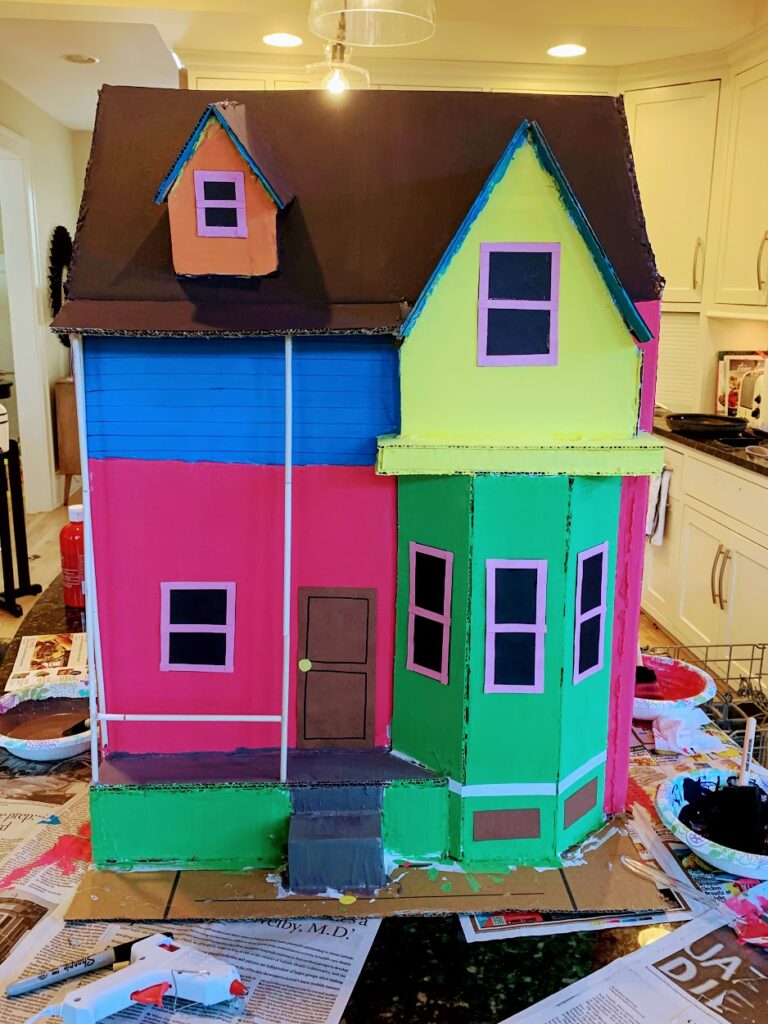
I used construction paper to make the windows and door! This was the easiest way to put it together. I use a glue gun to glue it on the house! I found wooden sticks at hobby lobby to use for the porch. I had to cut and add some sticks together to make them fit. It ended up working out well.
Step 7: Shoulder Straps
You might need a friend to help you get the box on and see where you would want the box to lay with the shoulder straps. I used some burlap ribbon, but you could use yarn as well. I used a hole punch to make a hole big enough to tie it. It helps to have a friend to hold the box while you adjust the length you want.
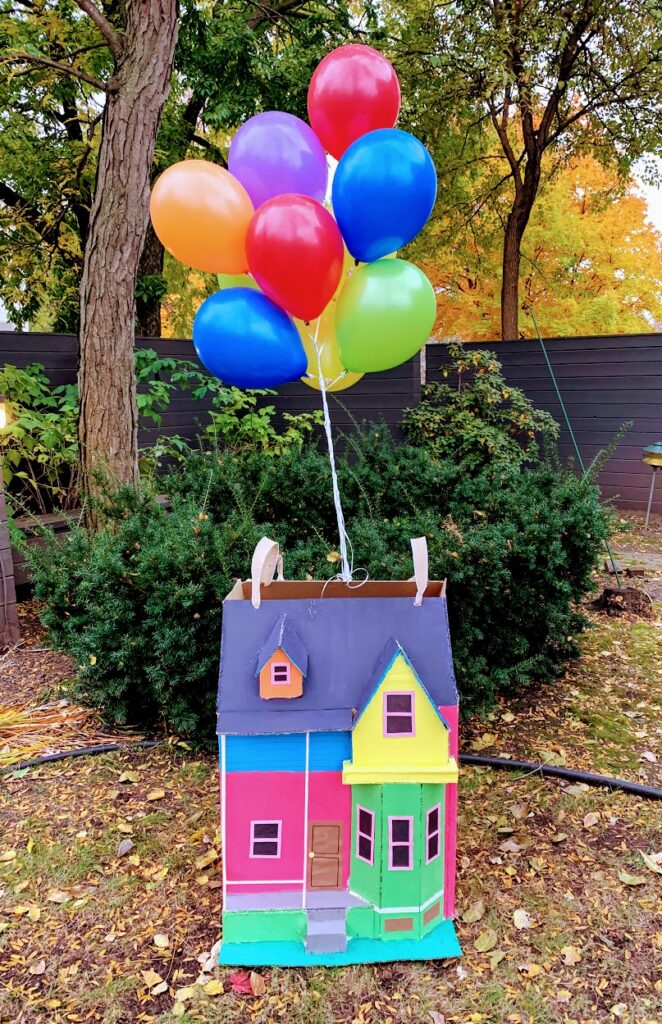
Step 8: Balloons
I went to Party City to get the balloons. You can call or go in and place an order. You schedule a time and day when to pick them up. Then the day you want to wear your costume you go and pick the balloons up that morning. They will only last one day so make sure to pick them up the day of.
You will want to cut some of the balloon strings shorter so they are not all the same height. I then used a hole punch to make a hole and tie the ballon strings. If you do want to get pictures make sure its not windy the day of your photoshoot. You won’t be able to get a good picture with the balloons above the house.
I tried my best to document and help you create this fun Halloween costume. If you have any questions as you go through the process to make the Up house costume comment below and I will do my best to reply and help out!
DON’T FORGET TO PIN THIS DIY COSTUME TO YOUR FAVORITE PINTEREST BOARD FOR LATER
This is adorable!
Excellent blog post. I certainly love this website. Keep writing! Leah Ase Elliott
Thank you so much for your tutorial! I made it to go with my Carl Frederickson’s costume. Both turned out great. Thanks again for your time!
Yay! I can’t tell you how happy this makes me! So glad it helped!
Hi! This is great thanks so much 🙂 I can’t figure out how to keep the front flap straight :/ any ideas?
Sorry just seeing this. Front flap? over the door?
I could not have made my house without the help of your instructions!!! They were great. My husband and I won the costume contest at ours friends annual Halloween party. Thanks so much.
This just made my day! Thank you so much and I’m so happy it helped!
I used your tutorial as a basis for making a baba yaga hut costume(box house body, with chicken legs and feet). It was so helpful to know where to start! Thank you!
Omg yay! So glad I could help!