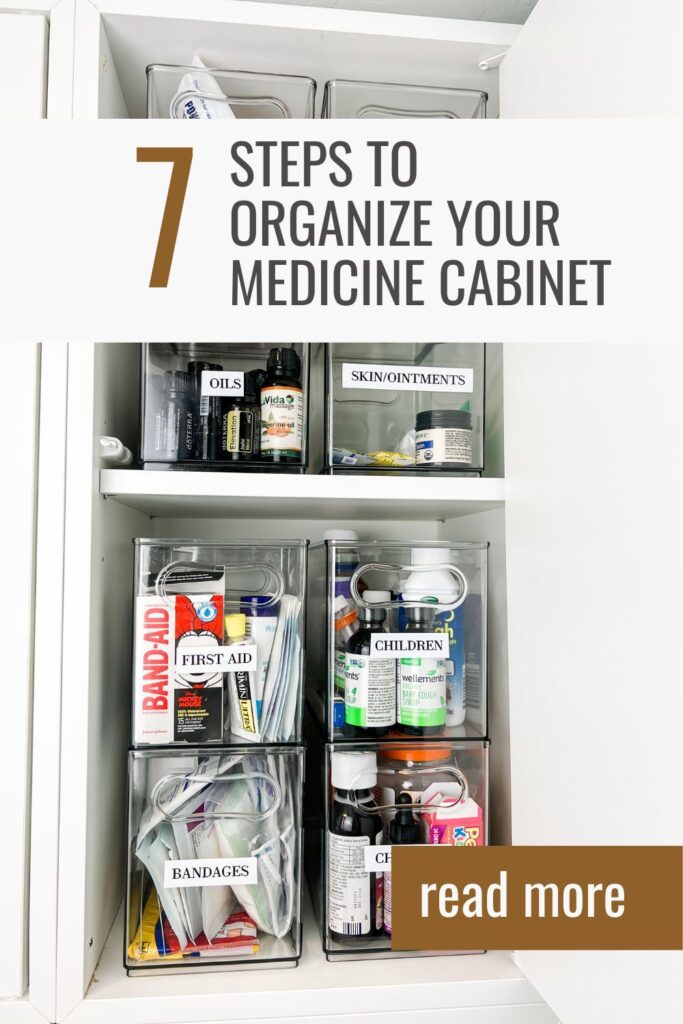
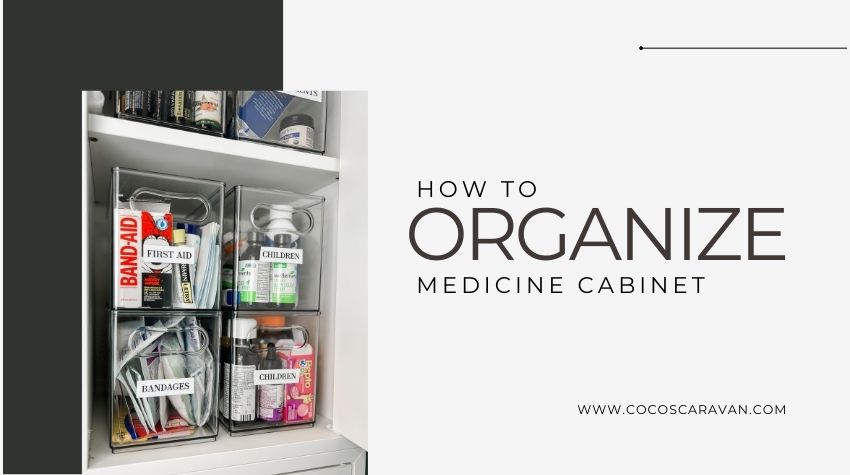
How to organize your medicine cabinet in 7 easy steps
If you need help to organize your medicine cabinet I’ve got your back. I show you seven easy steps to get your medicine cabinet organized and ready to go so you can find things faster and easier.
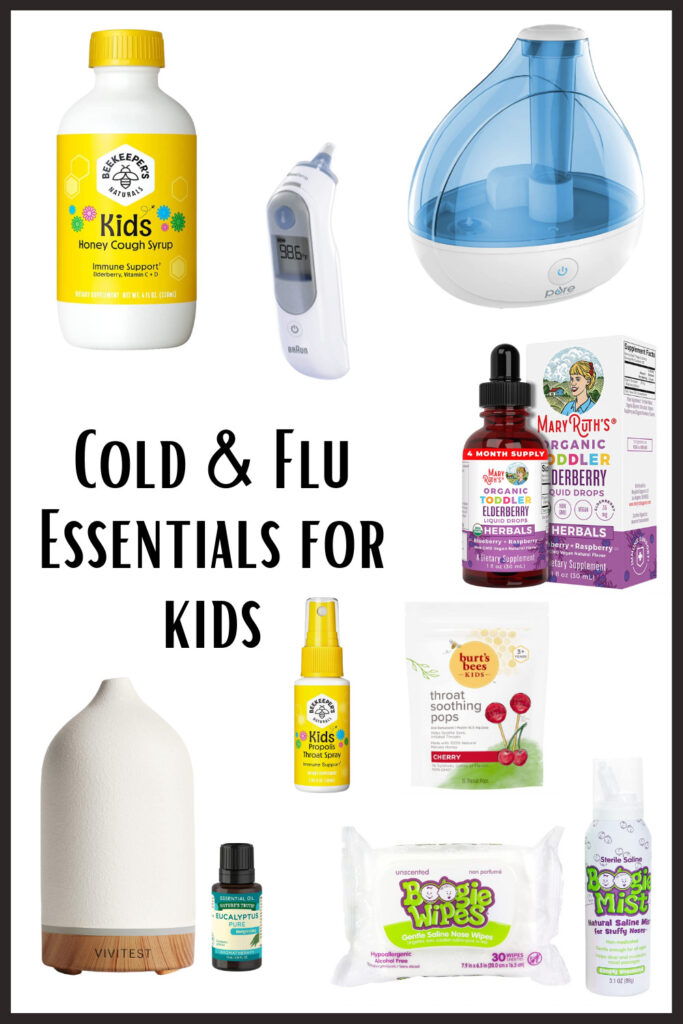
Make sure you are stocked up for Cold and flu season. You can see all the essentials I have on my Cold and Flu Essentials blog post. Its always good to be prepared and have good quality products.
Table of Contents
Watch my video for more help
Why you should organize your medicine cabinet
Organizing your medicine cabinet is important for several reasons. First, it can help you keep track of what medications and supplies you have on hand, ensuring that you don’t accidentally run out of something important. Second, organizing your medicine cabinet can help prevent expired medications from lingering in your cabinet, reducing the risk of accidentally taking medications that are no longer effective.
Third, it can help you quickly find what you need in case of an emergency or sudden illness, reducing stress and saving time. Additionally, organizing your medicine cabinet can help you safely store medications out of reach of children and pets, reducing the risk of accidental ingestion. Overall, taking the time to organize your medicine cabinet can help you stay prepared and promote safety and good health practices.
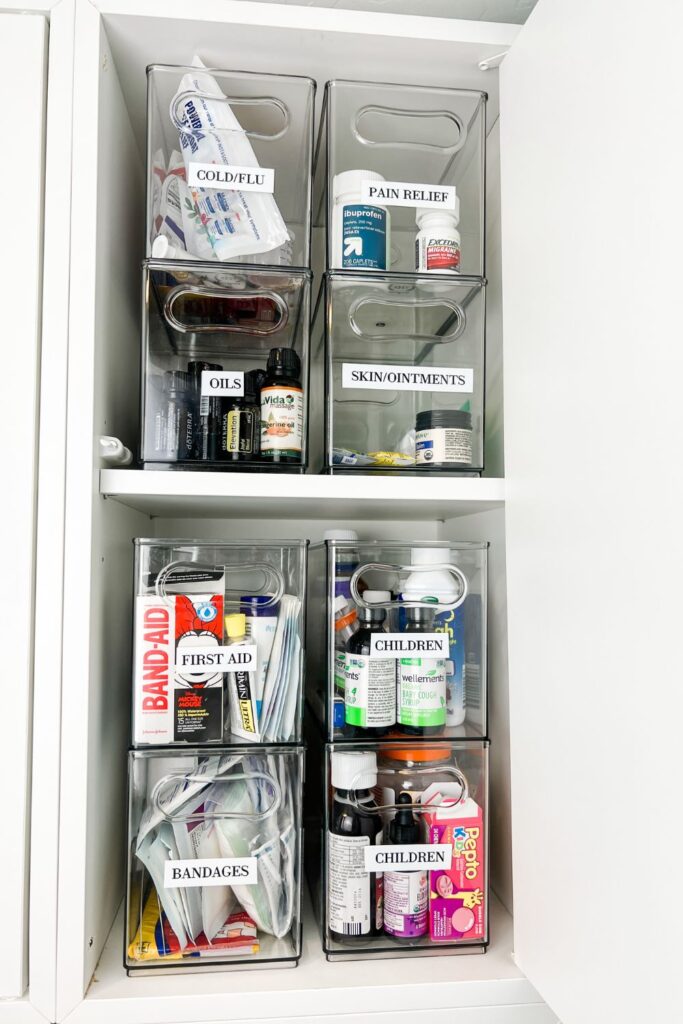
7 easy steps to organize your medicine cabinet
Step 1: Clear out cabinet
First step to organize your medicine cabinet is to clear out your cabinet. I like taking everything out and laying it on the floor. I then love to use some cleaning supplies and wipe the cabinet down and clean inside.
Step 2: Trash expired items
You will want to trash the expired items that you no longer need.
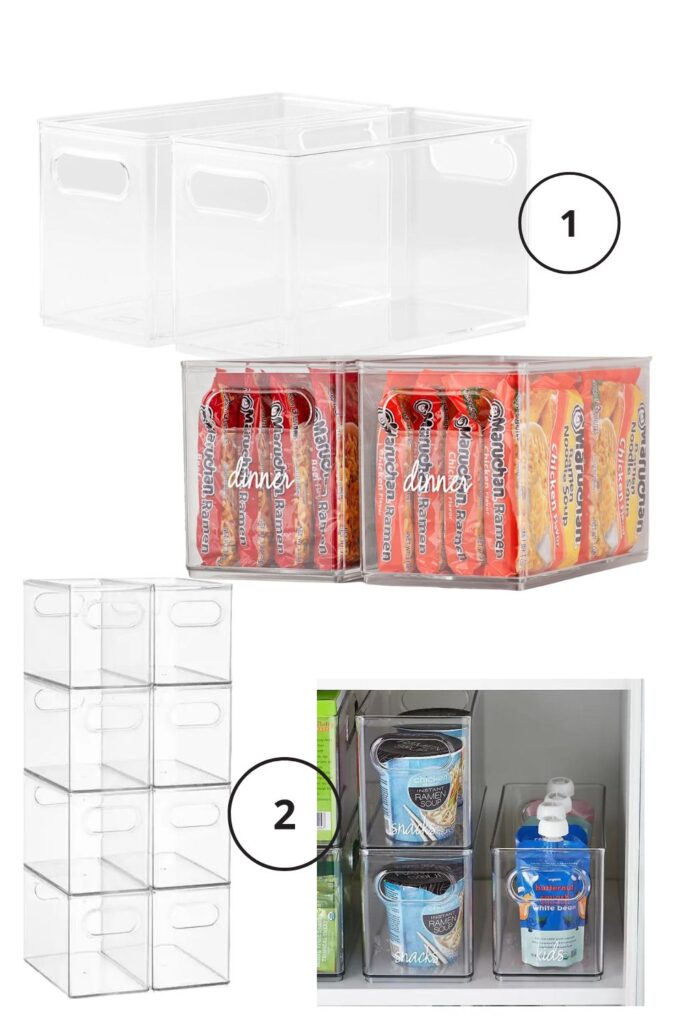
Step 3: Measure your cabinet to buy bins
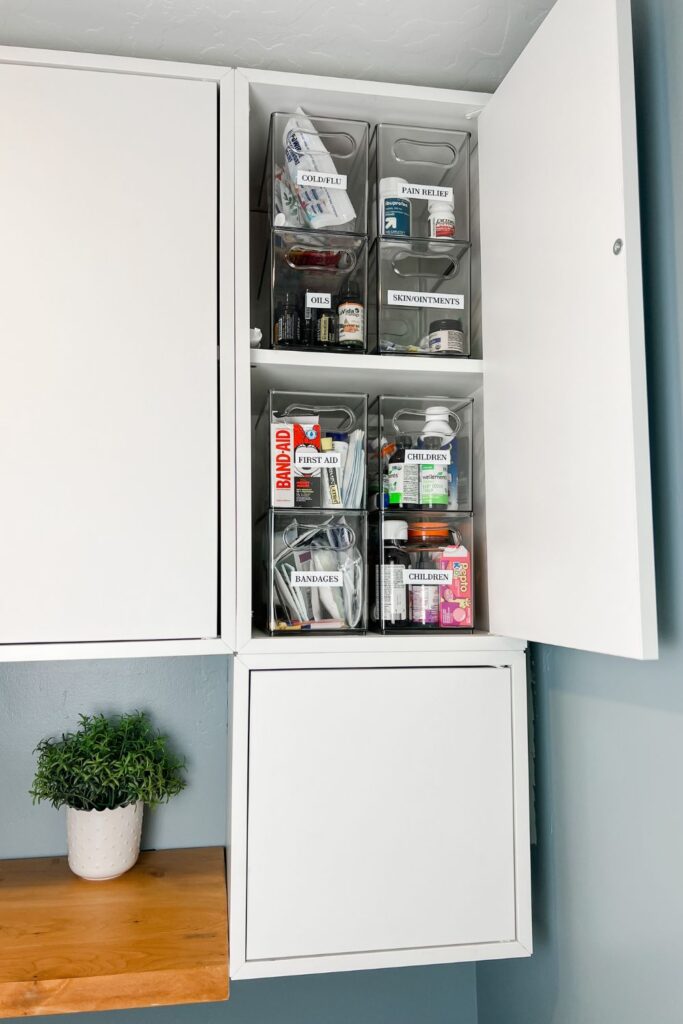
You will first want to measure your cabinet to see how many bins you will need to buy. Each bin will be a category so depending how how many bins you can fit that will determine your categories. Measure length and width to see how many you can stack on top and side by side. See more ideas for bins on my Pantry Organization blog post. You might want wider bins.
Step 4: Sort Items into categories
The third step to organize your medicine cabinet is to sort your medicine into categories. If you did step 3 correctly that will let us know how many bins you will have, which will be how many categories you can have.
Example of Categories:
- allergy
- Adult cold and cough
- kids could and cough
- digestive
- nasal
- pain relief
- first-aid
- bandages
- ace bandages
- essential oils
- thermometer
- medical supplies
- asthma
- vitamins and supplements
- miscellaneous
- pet medicine
- prescriptions
- sleep
- sun screen
- Ear, Eyes, Nose, & Teeth
- Skin and ointments
My cold and flu essentials for my kids
The ultimate cold and flu season essentials for kids. Everything you need to boost their immune system and fight that cold to get your kids feeling better. On the blog post HERE.
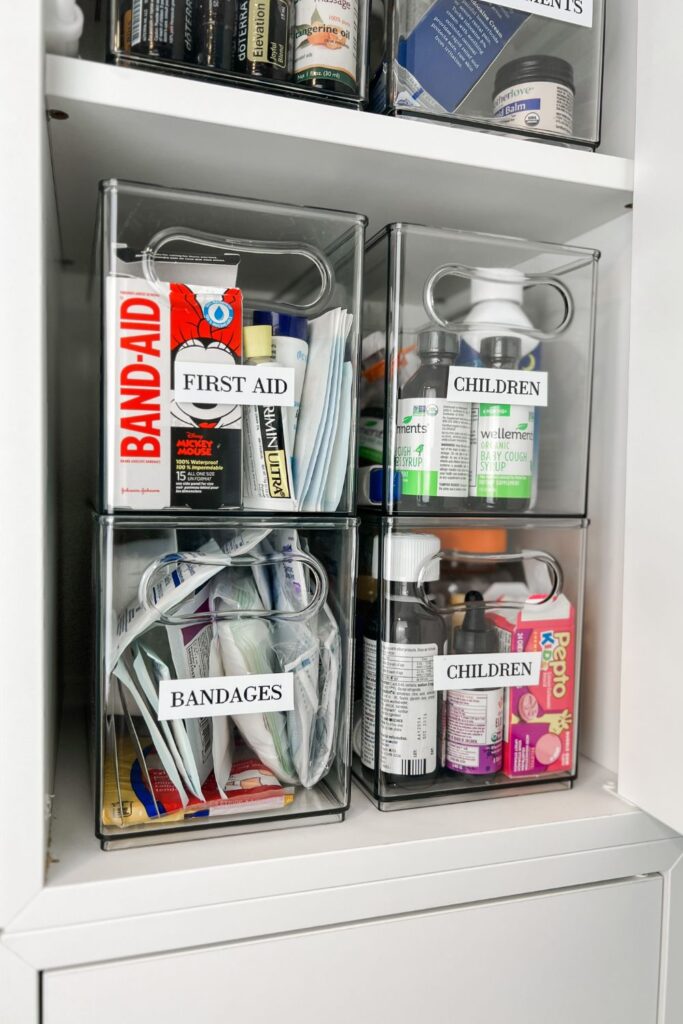
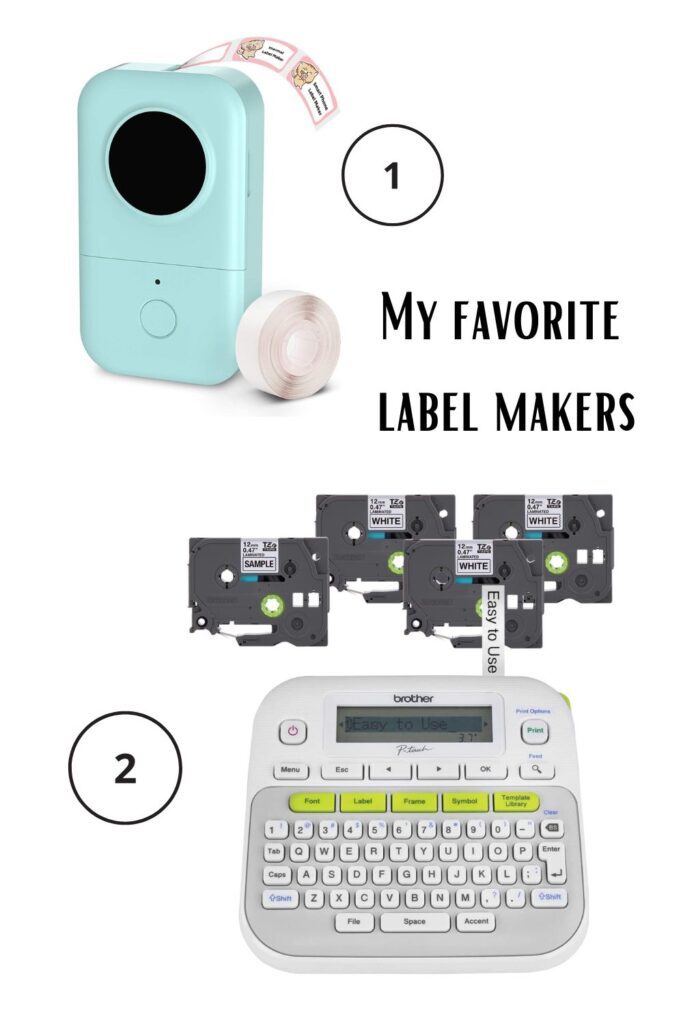
Step 5: Label Bins
You will want to label your bins before you stock them. I use this label maker to label all my bins. It helps finds things easier when it’s labeled.
Step 6: Stock items into your bins
Once you have trashed the expired ones, sorted them into categories, and labeled the bins, you can start to stock them. If the bottle is too tall and a bin won’t fit on top, then make that bin be on top.
Step 7: Put back into your cabinet
Put them back in your cupboard in any order you like. I like having easier access to my children medicine because I use that the most during the winter. You will be so happy you took the time to organize them!
This post may contain affiliate links. See my Full Disclosure for further details.
Pin this to your Organization board on Pinterest to find later