How to Make a Custom Birthday Banner (Easy & Affordable!)
Create your own birthday banner with this easy DIY guide! Learn how to design, print, and assemble a custom birthday banner at home to match any party theme.
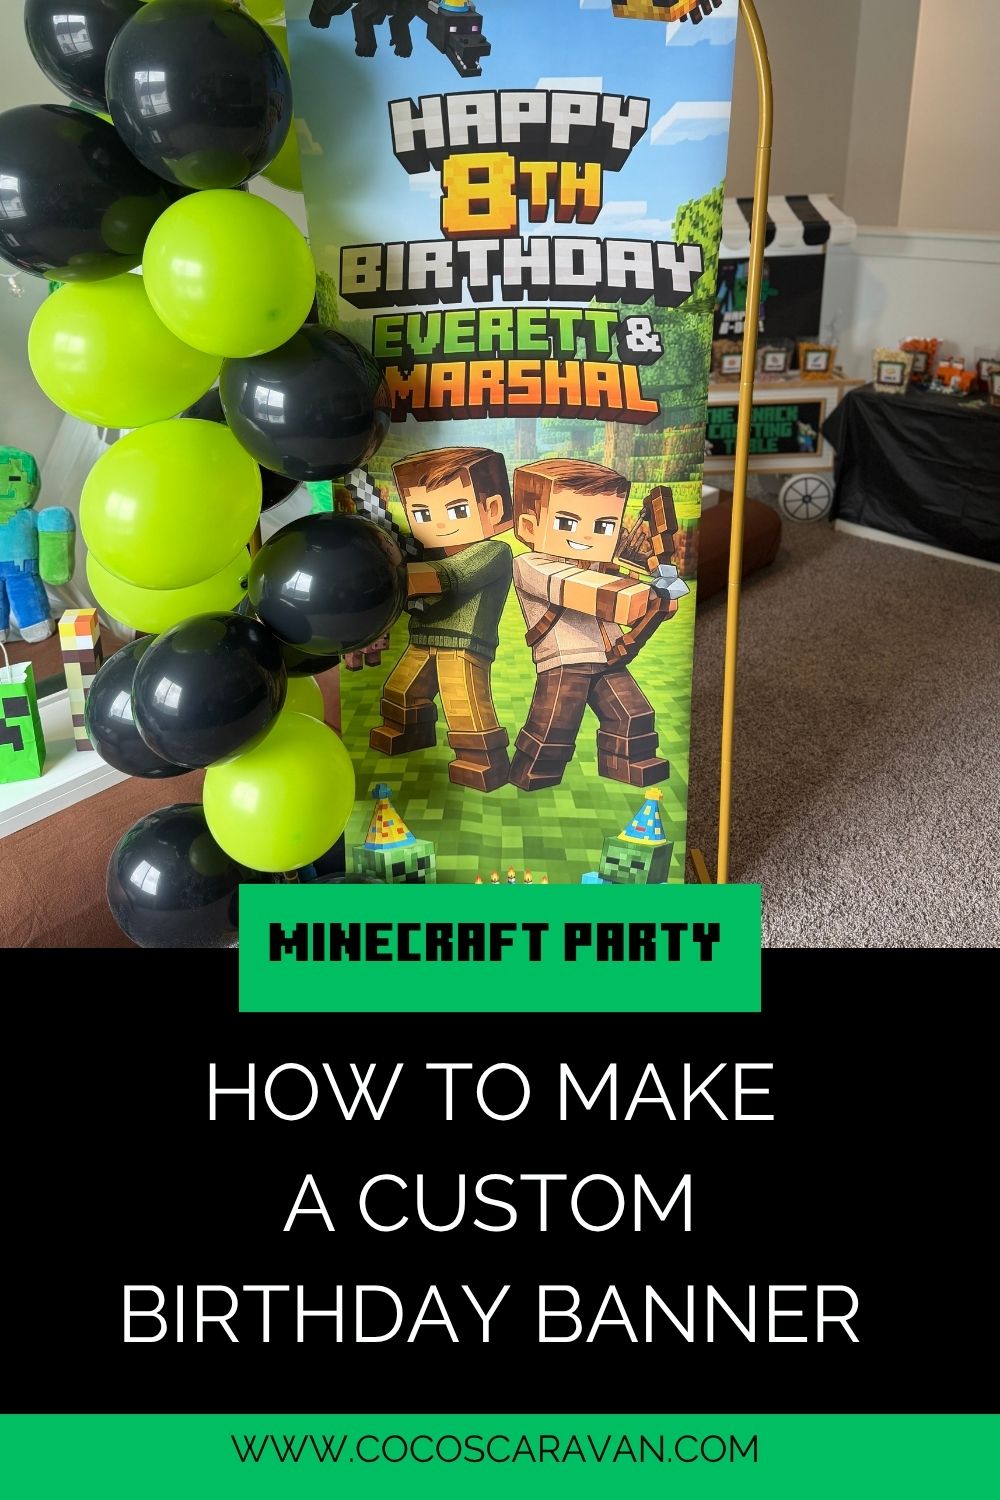
Table of Contents
Why I made my own birthday banner
I decided to make the boys their own birthday banner after seeing someone do something similar for a wedding with their bridal photos, and I thought wait, this would be just as easy to do for a birthday party. I loved the idea of making something custom that felt really personal, especially for their Minecraft theme.
It ended up being such a fun little project, and honestly made a bigger impact than I expected. The boys absolutely loved seeing themselves on the banner, and it added so much to the overall decor. It was one of those simple things that made the whole party feel extra special and it turned out so cute! 💛
My Birthday Party Must Haves
Designing Your Birthday Banner
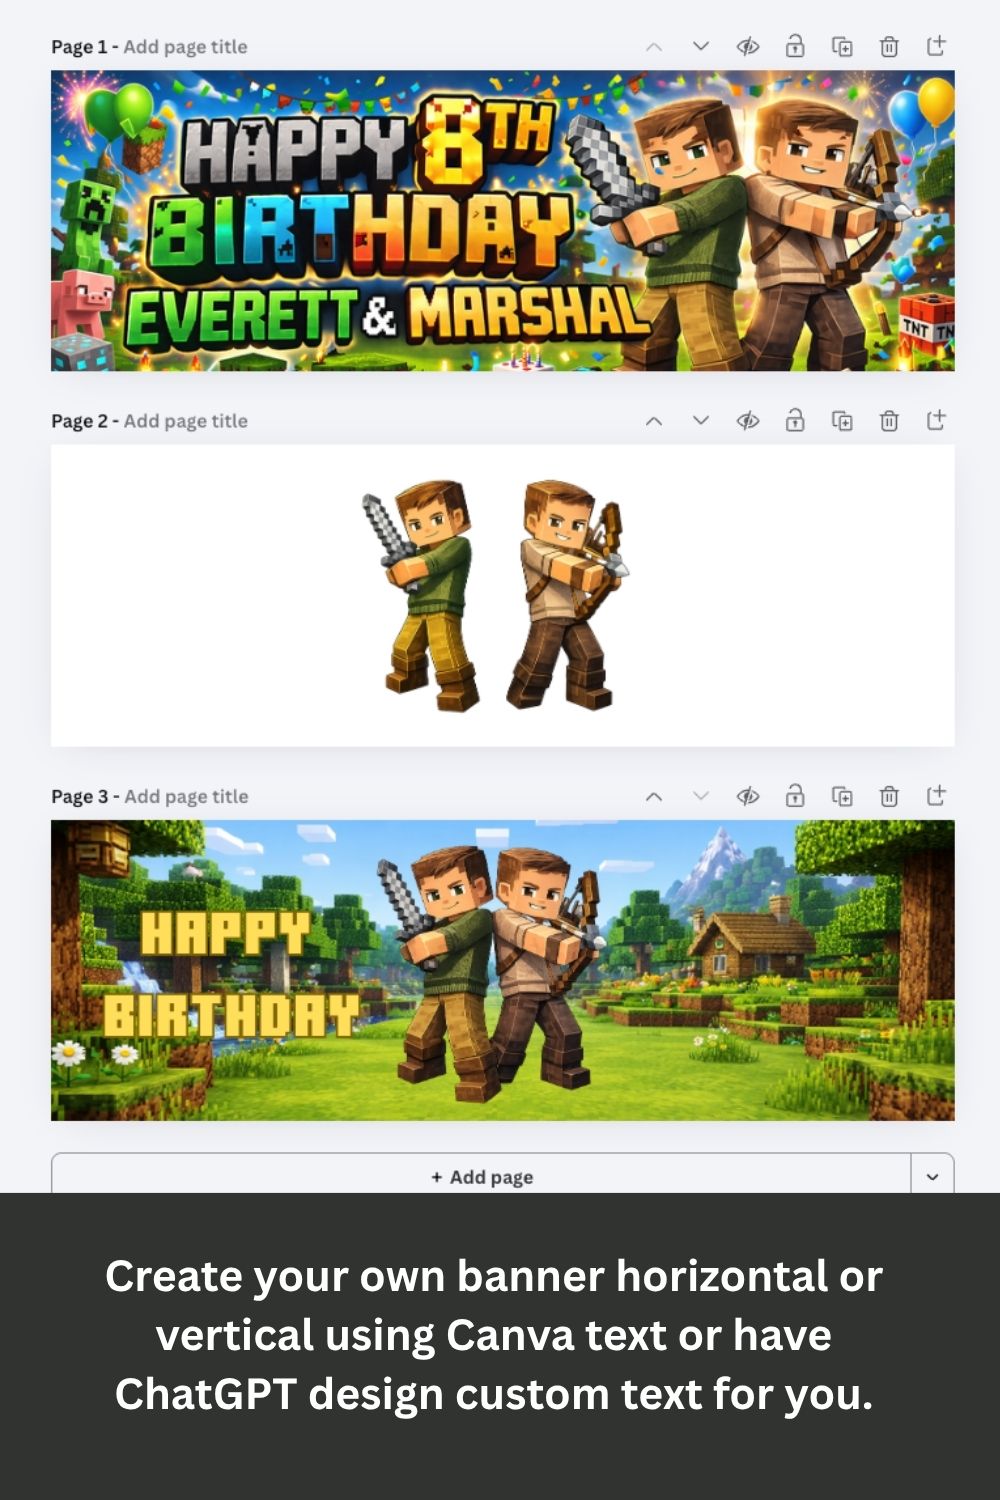
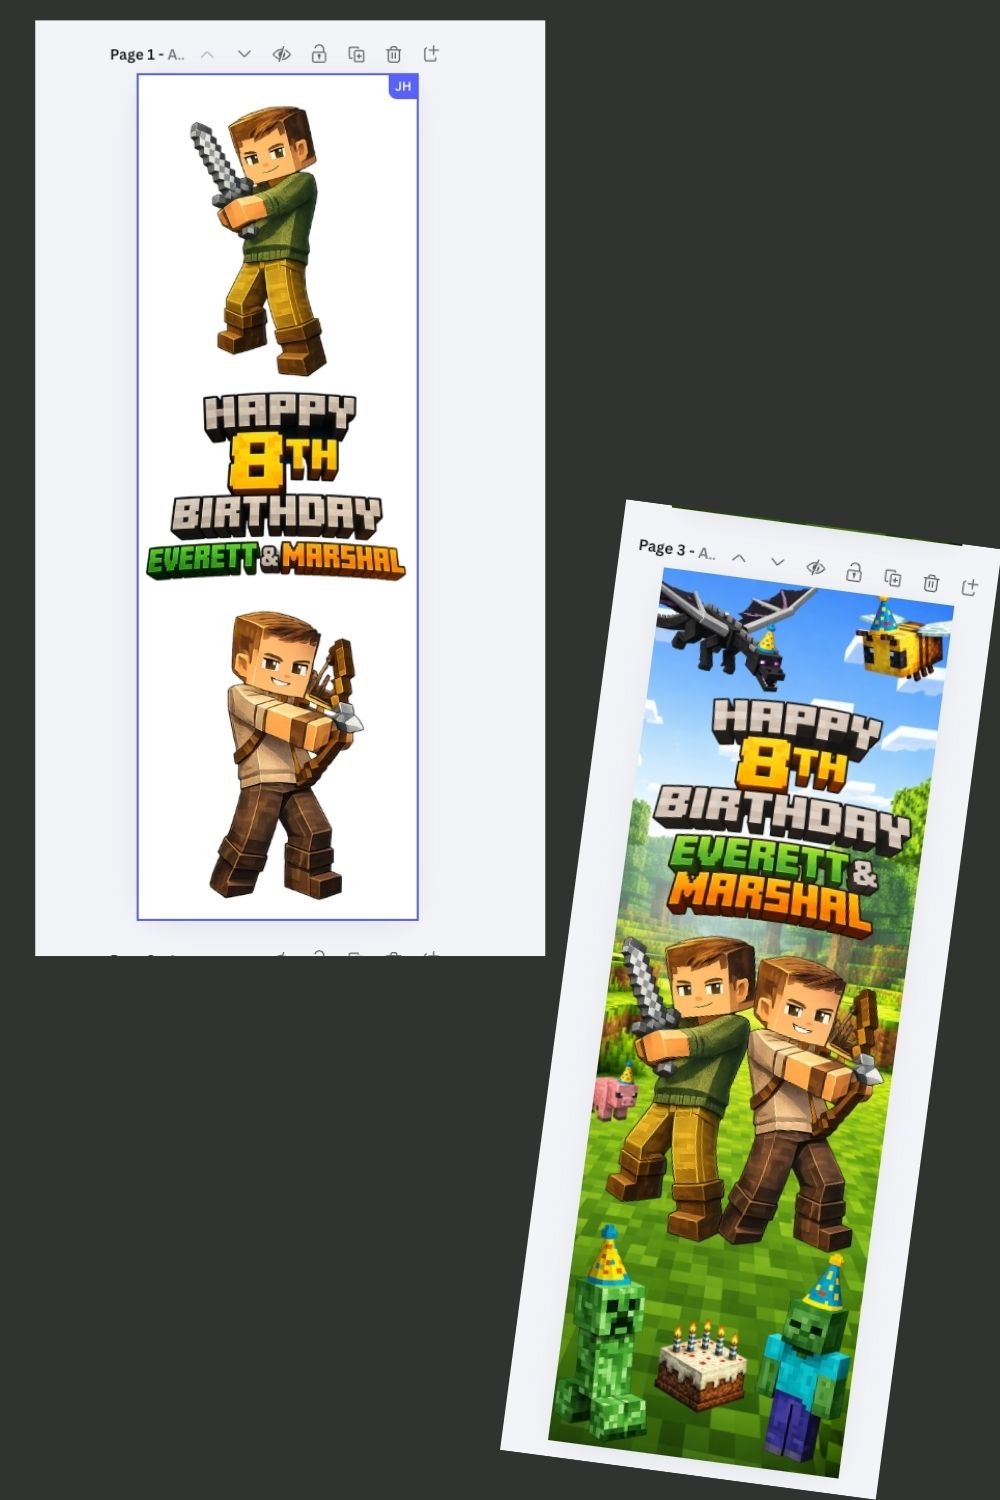
The fun part of this whole project is designing your birthday banner. You could totally keep it simple and just add a photo of your child with some text, but I wanted to take it a step further and really tie it into their Minecraft themed birthday party. I used Canva and ChatGPT to bring the whole thing together. In Canva, you’ll want to set your custom dimensions to 2400 x 7200 px for a vertical banner, or 7200 x 2400 px if you’re doing a horizontal one.
Step 1 Canva: I used Canva and ChatGPT to bring the whole thing together. In Canva, you’ll want to set your custom dimensions to 2400 x 7200 px for a vertical banner, or 7200 x 2400 px if you’re doing a horizontal one.
Step 2: I kept it super simple and just Googled “Minecraft background photos” until I found one I liked. I downloaded it and uploaded it into Canva, then resized it to fit my banner dimensions. It was such an easy way to instantly make the whole design feel on-theme without a lot of extra work.
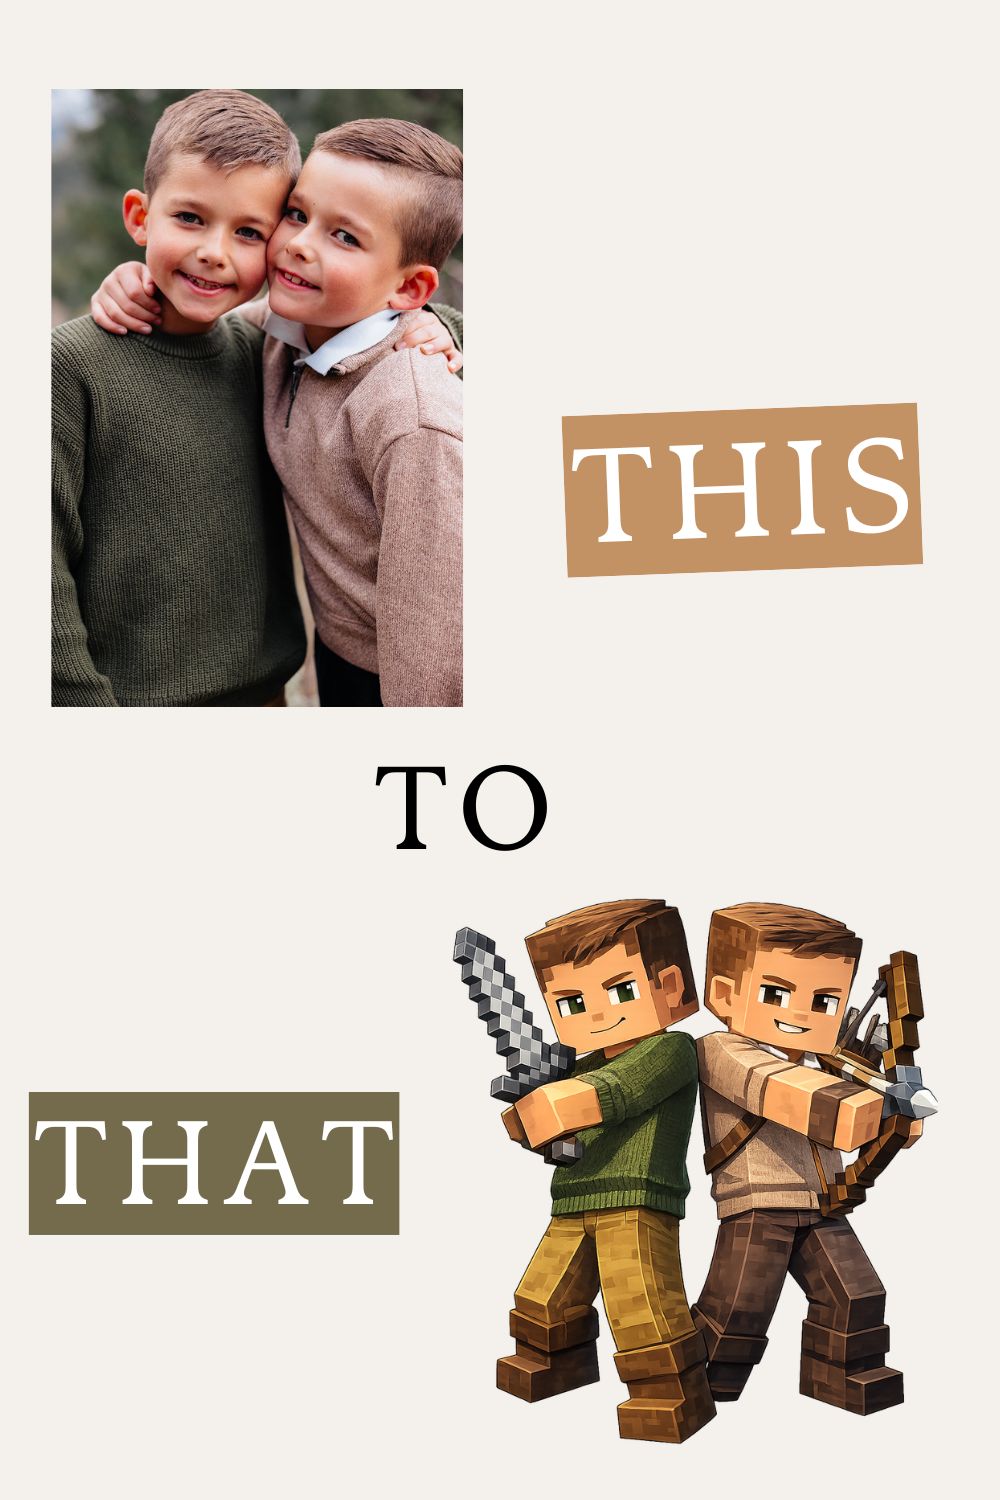
Step3: From there, I went into ChatGPT and asked it to create a PNG of my boys as Minecraft characters. I uploaded a photo of them and requested a transparent PNG version styled as Minecraft characters, which made it so easy to drop right into my design.
Step 4: For step 4, you can use the text tool in Canva to add whatever wording you want. But I took it a step further and used ChatGPT to generate text in a Minecraft style font, then added that above the PNG image of the boys as Minecraft characters. It gave it that extra themed look that tied everything together. Just make sure when you create your images or text, you have them exported as transparent PNG files so they layer perfectly onto your banner design.
Step 5: For step 5, I thought it would be so fun to add some Minecraft characters around the edges of the banner to really bring it to life. I had them wearing little birthday hats and eating cake, which made it feel extra festive and playful. You can print the ones I made for free or create your own! I used a simple prompt like: “Can you make a transparent PNG image of a creeper eating cake wearing a birthday hat,” and it turned out so cute. It’s such an easy way to add personality and make your banner feel completely custom.
For step 6, once your design is finished, you’ll want to download it correctly so it uploads without any issues. In Canva, click Download and choose your file type if your design has transparent elements (like your Minecraft characters or text), go with a PNG. If it’s a full image with no transparency, a JPG can work too and will usually be a smaller file size. The main difference is that PNG files keep transparency and higher detail, while JPG files are compressed and smaller but don’t support transparent backgrounds.
If you’re uploading your banner to a print shop like Walgreens, PNG is usually the safest choice for quality. If your file won’t upload, it’s most likely too big try lowering the quality slightly in Canva or switching to a JPG to reduce the file size. This step makes a big difference in making sure your banner prints clean and without any issues!
Printing Your Banner
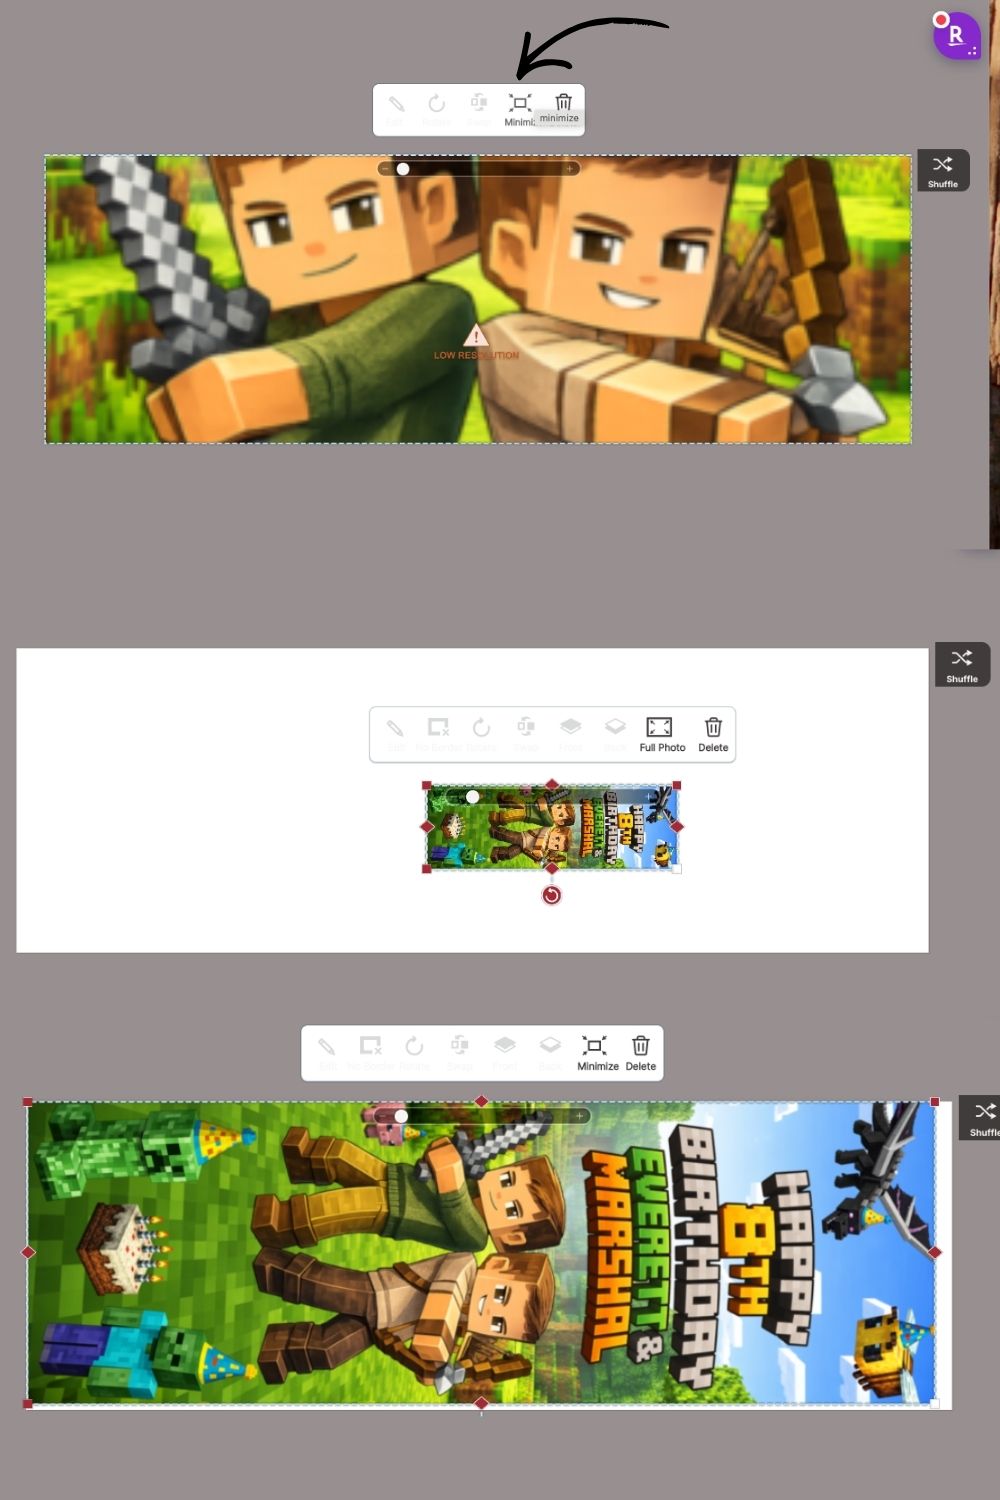
I printed my birthday banner at Walgreens, and it was so easy it can even be done within an hour! I chose the custom banner option and selected banner paper in the 2×6 size. It takes you to a design page where you upload your banner image. Since I designed mine vertically, I selected “minimize” so it would shrink, then manually rotated it to fit and dragged it out to the edges.
If it says low resolution, try making it slightly smaller (you might end up with a little white around the edges) or upload a smaller file. Then just hit review order and checkout! They almost always have great sales I used a 50% off code and printed mine for around $15, which was amazing. Just select your local Walgreens, and they’ll notify you when it’s ready for pickup!
Assembling Birthday Banner
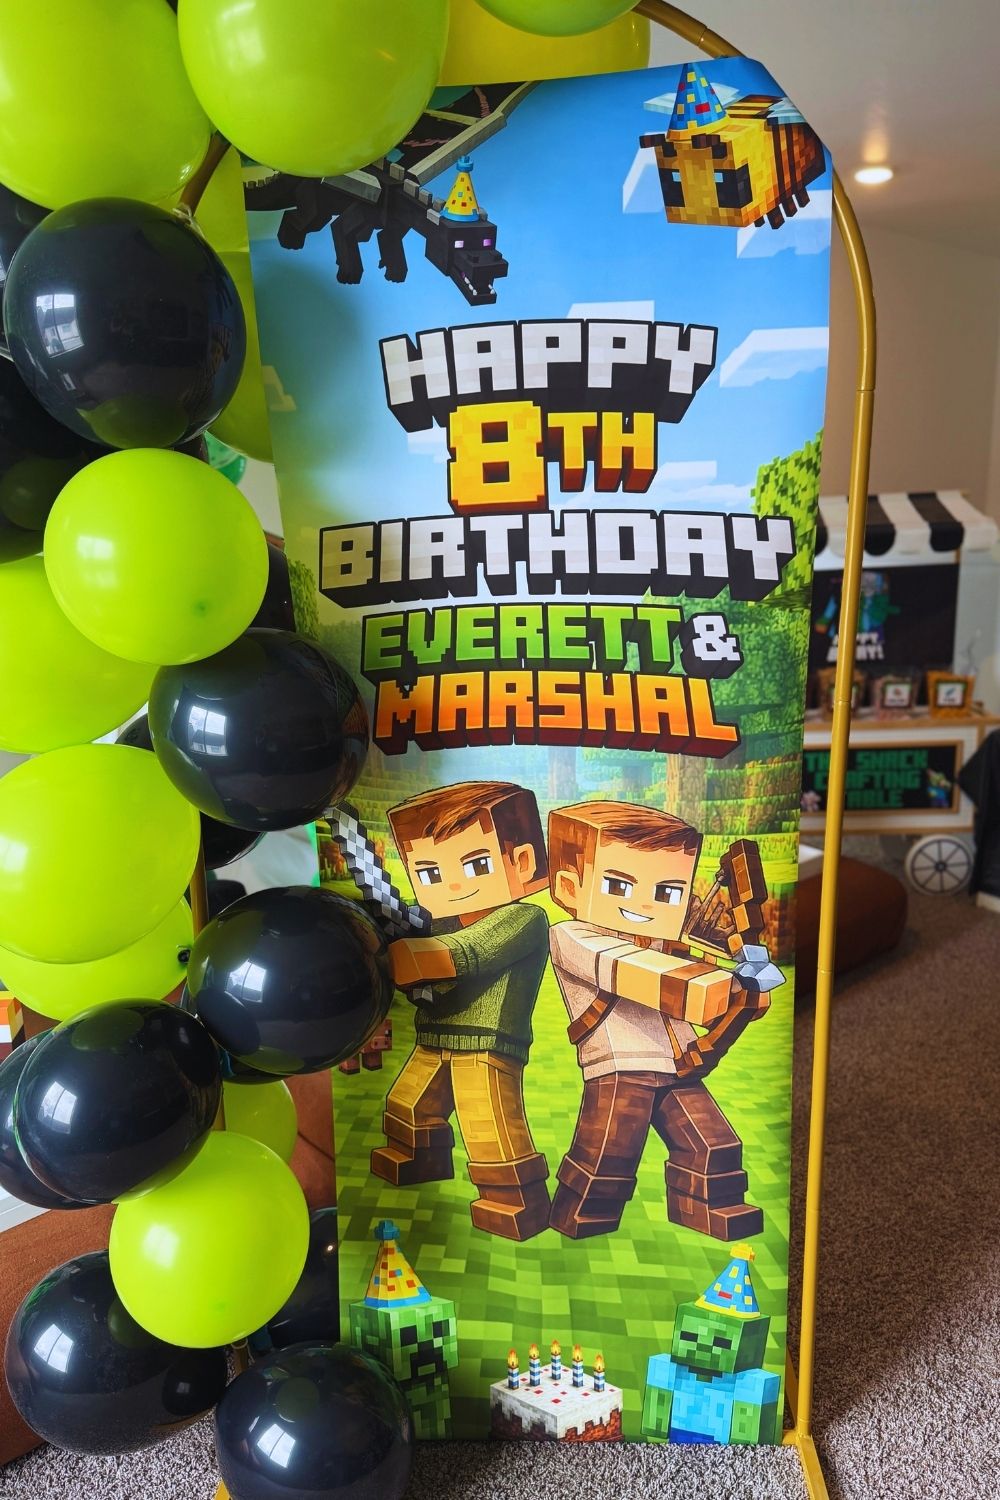
I used my 6ft metal arch backdrop stand to attach the banner, and it seriously made such a difference in how everything came together. Once the banner was up, I taped balloons along the sides of the arch, which really made it pop and feel like a full backdrop moment instead of just a banner on the wall. The boys absolutely loved it it felt so fun and personalized, and honestly took the party from something simple to looking like someone came in and styled a custom setup. It was one of those details that made the whole party feel extra special without a ton of extra work.
See more of my birthday parties on the blog
I love sharing all of the DIY parties I’ve put together over the years, and so many of them include tons of free printables to make it easier for you to recreate at home. From themed decor to food labels and little details that pull everything together, I’ve got you covered. If you want more ideas and inspiration, you can check out all of my past parties here!